
A detailed guide for hiking the Kepler Track in 3 Days. Get the most out of this incredible hike without paying hundreds in hut fees!
The Kepler Track in South Island’s Fjordlands is known as one of the best Great Walks in all of New Zealand! However, as you probably already know, the cost per night for staying in the huts goes well over $100 per night!
If you do have the means to pay these fees, then it is worthwhile, since the money is going directly to the DOC, who do a fantastic job in protecting New Zealand’s biodiversity and maintaining all of the park tracks and routes.
However, I don’t believe that budget travelers should have to miss out on the Great Walks simply because the pricing structure is aimed at “big-spender” travelers.
In this guide, I’ll outline how to hike the entire Kepler track, with some tips on how to save some money in the process.
RELATED: Guide to Hiking the Routeburn Track in One Day
Everything You Need to Know About the Kepler Track
- Elevation: Highest Point: 1470 m AMSL (Luxmore Summitt
- Total gain elevation gain: 2450 m
- Length: 65 km
- Difficulty: Moderate; some steep sections and long but not technical.
The Kepler Track is considered one of New Zealand's "Great Walks". The track is located in the incredible Te Wāhipounamu – South West New Zealand World Heritage Area. The track leads through beautiful beech forest along Lake Te Anau before climbing alpine vistas above 1400 meters with incredible views of Lakes Te Anau and Manapouri.
Although it's a fairly long hike, it's not at all technical in the Great Walks Season. However, you'll need alpine/avalanche experience and equipment in the winter months.
You can find more up-to-date information on track closures and safety information on the DOC website and by downloading the official brochure.


Hiking Clockwise or Anti-Clockwise?
For the purpose of this guide, I will be detailing a 3-day itinerary in an anti-clockwise direction.
While it's possible to do it both ways, I'd highly recommend doing it anti-clockwise since that way, you'll have the biggest climbs on the first day, as well as ensuring that you'll have the epic views on day two in front of you!
PREFER TO DO A KEPLER TRACK DAY HIKE?
Where to Start the Hike: Kepler Track Car Park and Control Gates
The start point for the Kepler Track loop is at the control gates, located near the township of Te Anau.
There is a large car park here where you can leave your car or camper for the duration of the hike, free of charge.
If you don't have a car or transport, you could try to hitchhike or walk to the control gates from the visitor center in Te Anau. This will add 1 hour to your hike, following the edge of Lake Te Anau before arriving at the control gate car park.
Kepler Track Transport
If you don't want to walk or hitchhike, you've got two transport options, get a boat to Brod Bay or book a shuttle bus.
Kepler Track Cost
Since the Kepler track is considered a "Great Walk" the hut passes and campsite bookings are much more expensive. Below a rundown of the costs.
| During Great Walks Season | Hut Pass Per Night | Campsite Per Night |
| Non-resident | $102 | $32 |
| New Zealand resident | $68 | $21 |
| Outside the Great Walks season | ||
| Non-resident | $32 | $5 |
| New Zealand resident | $21 | $5 |
To book campsites and huts in the Great Walks season, visit the DOC website. I'd recommend doing this well in advance to secure a spot. During winter, there is no need to book. However, you'll need to purchase a backcountry hut and campsite tickets.
Hiking the Kepler for $20 or $40
It's possible to hike the entire Kepler track for $21 for New Zealanders and $32 for foreigners. This is possible for both 3 day and 4 day itineraries.
The reason for this is that it's possible to freedom camp near the Luxmore Hut and near the Shallow Bay Hut. However, you won't be able freedom camp anywhere near the middle section of the hike (Iris Burn Hut) because it's simply too dense with no flat clearings to pitch a tent.
Therefore, the only necessary campsite fee is for the Iris Burn Campsite.
In regards to freedom camping laws in New Zealand, you are able to pitch a tent anywhere in New Zealand's parks, as long as you are 500 metres away from the Great Walks track.
For more information on where to camp at the Luxmore Hut, you can read my full guide with GPS coordinates here.

Kepler Track Map
Below is an approximate map of the Kepler track route. During Great Walks season, you will have no trouble finding your way.
This is because there are usually many other hikers and the track is always well-maintained and marked.

Related:
How to Hike the Routeburn Track in 1 Day
Kepler Track GPX Map
Here is the GPX file of the Kepler track that I recorded on my Garmin watch. If you want to, you can download it using the link below to use on your GPS watch or your phone.
GPX File: Download
My Strava: Visit
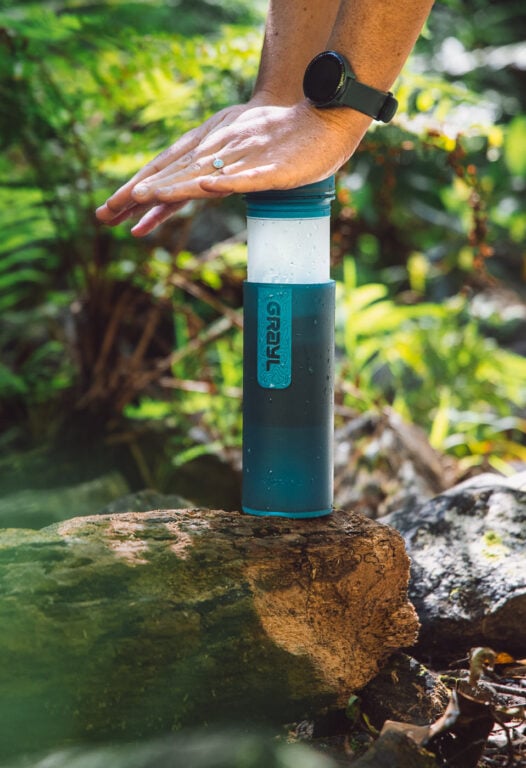
#1 Water Bottle Filter
Enter the Grayl GeoPress Water Filter & Purifier Bottle! I take this bottle on every hike and use it as my go-to source for filtering water all over the world. I've even used it to drink tap water in India!
// Compare how the GeoPress stacks up against the best water bottle filters on the market.
Hiking the Kepler Track in 3 Days
Originally, I had packed and plan to hike the Kepler in four days. However, after overestimating the legnth, we decided to push on and finish the hike in three.
This outline will follow the generally-recommended and most popular hike itinerary for the first two days, while essentially finishing the hike by combining the last two days into one.
The reason for this is that from the Iris Burn Hut back to the control gates, it is very flat, with little to no incline. So, if you're generally fit, you should have no trouble finishing this section in a single day.
However, if you'd like to finish the hike in 4 days instead, then I'd recommend just camping near the Shallow Bay Hut (see map). You are able to freedom camp here for free! Some blogs and sources online mention that you still have to pay the hut fee. However, after speaking to the DOC, this isn't the case for campers at the Shallow Bay Hut.
Day 1: Kepler Track Carpark to Luxmore Hut
- Distance: 14.6 km
- Elevation gain: 810 m
The track starts at the Kepler control gates marked in the map above. From here, there is an information shed and toilets as well as a freshwater tank to fill up your bottles.
The track follows the shore of Lake Te Anau for several kilometers. This section is pleasant and is a good warmup for the upcoming climb. After just over an hour, you should reach the Brod Bay campsite.


From here, the track begins to climb gradually through beautiful beech forest. This area is known for its large native bird population, so keep an ear out for their calls.
The climb from Brod Bay campsite to the Luxmore Hut is gradual and not too steep. However, you will gain over 800 metres of elevation before finally breaking out through the treeline.

It's a great feeling as you enter the rolling tussock plains. Here you'll get to witness the first views of Lake Te Anau from above, as well as Mt Luxmore and the rest of the Kepler Track as it winds its way along the rolling ridges.
The Luxmore Hut is roughly 30-40 minutes from the treeline.

Alternative: Begin at Brod Bay Campsite with a boat-transfer from Te Anau
Luxmore Caves
The Luxmore Caves is a short side-trip from the Luxmore Hut that only takes about twenty minutes return.
It's definitely worthwhile checking out if it hasn't been raining too much. The limestone cave system burrows deep under the tussock plains, with several small tunnels and a small running stream.


Camping Near the Luxmore Hut
Camping near the Luxmore Hut is one of the most popular ways to avoid having to pay the expensive hut fees and lower the overall cost of the hike.
Of course, if you have the funds, staying at Luxmore Hut is a great experience. It's one of the most scenic huts on the South Island and a great place to catch up with other hikers.
However, if you'd prefer to hike self-sufficiently and on a budget, it is possible to camp near the Luxmore Hut.
This is due to an old and confusing New Zealand law that allows freedom camping for anybody, as long as they are 200 metres from a regular track or 500 metres from a Great Walks Track.
The best for freedom camping near the Luxmore Hut is to walk to the Luxmore Caves, and continue 500 metres around the bluff, out of sight from the main trail.
Here I will link to an entire article about how and where to camp near the Luxmore Hut, including GPS coordinates.

Day 2: Luxmore Hut to Iris Burn Hut
- Distance: 18 km
- Elevation gain: 580 m (1040 m descent)
Day 2 offers by far the best views for the entire Kepler Track. Following on from the Luxmore Hut, the Kepler Track works its way around the bluffs and climbs close to the summit of Mt Luxmore. The track here offers views of small alpine tarns scattered along the vista.
Summiting Mt Luxmore
You'd be crazy not to make the short 5-10 minute ascent up to Mt Luxmore! The Kepler track is literally right below the peak and if you're lucky enough to get good weather, the views are spectacular.


Views on Views
The views of Lake Te Anau and surrounding mountains get better as the day progresses. Soon after Mt Luxmore, you'll see the track atop the jagged ridgeline beyond.
Keep your fingers crossed for good weather and enjoy the views! Make sure to stop and take it all in.


Related:
How to Hike to Roy's Peak in Wanaka
Descending to the Iris Burn Hut
After a few hours of climbing and descending the ridges, the track steeply descends back down into the bushline and into the Iris Burn forest.
This section is very scenic, with flowing rivers and small cascading waterfalls along the track. There are also several bridges with impressive views. Warm your knees up for the 800-metre descent back down to the Iris Burn campsite.
Remember, this area is the only place where you won't have a choice in the matter of paying for a site. You'll soon realise why. The surrounding forest is thick and lacks any viable clearings to pitch a tent.


Iris Burn Falls
After pitching our tent, it was time to go check out Iris Burn Falls. We braved the sandflies and pushed on for a freezing but refreshing swim at the deep pool underneath the waterfall.
The waterfall is roughly 15m in height and cascades in a "horsetail" shape. In high season, most people staying at the hut come here to wash off the sweat and dirt and relax after having completed the two most difficult days of the trek.

TIP: Don't leave any food in your tent. The Iris Burn campsite is known to have dozens of mischievous Kea birds that come at sunset to wreak havoc. One of the hikers had his whole brand new tent chewed to bits while he was at the falls. There is a resident DOC staff member at the Iris Burn Hut.
Day 3: Iris Burn Hut to Control Gates
- Distance: 33 km
- Elevation gain: 50 m (200 m descent)
We considered ourselves lucky as we woke up with no tent holes from mice or kea. However, the weather had turned on us on the 3rd day. With rain forecasted for the rest of the day, we quickly packed up our soggy tent and cooked breakfast underneath the undercover cooking area.
Again, this final day of the Kepler track is long but flat, with only small sections of incline. Besides the incredible podocarp and beech forests, there is also little that warrants a stop.

After a few hours, you'll reach Lake Manapouri. There are several trails that lead to beachside access where you can relax and enjoy lunch.
From the Moturau Hut, the track continues on to follow the Waiau River, past the Rainbow Beach Bridge and finally arriving back at the control gates.

Of course, this day is going to be the longest. However, since it's so flat, it's definitely possible to complete this section in a single day. At any time you can make the call to camp at the Shallow Bay Hut for free. You could also check if there is space at the Moturau Hut, however, you usually need to book in advance.

Related:
37+ Awesome Things to do in Queenstown
Optional: Stay at Shallow Bay Hut
To stay in the Shallow Bay Hut, you will need a $5 unserviced hut pass. You can purchase these from the DOC visitor centre in Te Anau.
This hut is definitely not up to the standard of the regular with mosquitos and sandflies being a big problem. However, it does offer shelter from the elements if you need it.
I'd prefer to camp next to the hut for free, where there are a few cleared areas, since that way you can block out the mosquitos. Of course, this will only apply for those looking to do this hike in four days, not following this Kepler track 3 day itinerary.
Optional: End at Rainbow Beach Bridge
If you want to finish early, you can also call it quits at the Rainbow Beach Bridge. This cuts off over an hour of the hike back to the control gates.
In saying that, you'll need to either leave a car here or organize transport from the bridge back to Te Anau or the control gates regardless.
More Kepler Track Photos
Here are some more photos that I snapped along the way on the Kepler Track New Zealand. Hopefully they inspire you to take this incredible hike!


More New Zealand Travel Guides and Hikes
If you have any up-to-date information for completing the Kepler track in 3 days, help other travelers out by leaving a comment below. If you have any other questions, feel free to contact me personally, or leave a comment.
For now, if you're looking for more South Island travel guides and blogs, you'll find them in the list below. Want more hikes? Don't miss this list of the 31 Best Hikes in South Island New Zealand.
Veronica
Monday 6th of February 2023
Hi guys, must confess that your itinerary just amazed me! Loved it! Have a question - I booked an Iris hut campsite as the only one during Kepler. Received e-mail with several informations and one of them is the fact, that I should (they wrote "must") check-in in Te Anau Info centre the day before to collect tickets (?) .Did you guys have to do it? Quite afraid, that won't see smile after "freedom camping" plan for one night.. Thanks for inspiration! Veronica
Olly Gaspar
Monday 6th of February 2023
Hey Veronica,
The DOC is pretty chill with freedom camping as long as you aren't breaking any rules. They'll likely just tell you to minimize impact and ensure you take your rubbish with you etc.
Ashleigh Radsyn
Sunday 13th of December 2020
Hi Olly, thanks for the great itinerary! Judt wondering what month you did this in?
Olly Gaspar
Monday 14th of December 2020
Hey Ashleigh,
I hiked the Kepler in February :)