A complete guide to tackling the Mount Bartle Frere Hike to summit Queensland’s tallest mountain. Trail information, overnight camping options and everything else you need to know.
Mount Bartle Frere is located in the Wonooroonan National Park, approximately 51 KM from Cairns. It’s the tallest mountain in Queensland, and one of my personal favourite hikes in all of Australia.
The Mount Bartle Frere hike is a pretty steep climb but offers some of the best views around Cairns and the Atherton Tablelands. It can be completed in one long full-day hike, or you can camp near the summit at a designated Mount Bartle Frere camping site.

Getting to the Mount Bartle Frere Track
The hiking track begins at the carpark for Josephine Falls, located 51 KM southwest of Cairns near the town of Babinda.
I’ve pinned the exact location of the trailhead on Google Maps below
If you’re attempting the summit over two days and you want to camp, then it’s possible to leave your car there overnight for free.
At the Josephine Falls carpark, you’ll see a sign pointing towards the Mt Bartle Frere track just past the track to Josephine Falls.
The Eastern Approach to the Summit
This track takes the more popular eastern approach to the summit. This track is more difficult and steeper than the western side. However, it’s more scenic, very well marked and closer to Cairns.
Mount Bartle Frere Hiking Guide
Here’s some quick summary information about the Mt Bartle Frere hike to help you out. For more detailed information on the route, read on a little further.
Mount Bartle Frere Duration
The Mount Bartle Frere hike is usually attempted over two days. It takes approximately 4.5-5 hours to reach the summit at a quick pace with little stops and in great weather.
We departed from Josephine Falls carpark at first light, at around 6:45 AM and made the summit at 12:15 PM. While it is definitely possible to reach the summit and descend on the same day, it’ll be a little rushed and definitely tough on the knees.
Instead, there is a campsite known as Eastern Summit Camp, where you can set up a tent and choose to either summit on the same afternoon or in the morning.
Distance
The total distance as marked on the trails and information from QLD Parks states that the total distance to the summit is roughly 9 kilometers. However, on the Mount Bartle Frere track, we clocked about 11 kilometers, possible due to the winding turns during the ascent. This seems to match what others have been getting on Strava.
Our combined hiking distance for the ascent and descent was just short of 23 kilometers return.
Elevation
Mt Bartle Frere is Queensland’s tallest mountain with an elevation of 1611 meters above sea level. It’s a strenuous and tedious climb to the summit, with an average gradient of 20-degrees in most sections.
Difficulty
You might be wondering; “How hard is the Mt Bartle Frere Hike?” The track is considered very difficult, with long segments of steep climbs, some even vertical. In saying that, you won’t require any technical climbing skills, just a decent degree of fitness to reach the summit.
While it’s not Australia’s tallest mountain, Mt Bartle Frere is definitely a more physically difficult hike than the titleholder; Mt Kosciuszko.
Camping on Mount Bartle Frere
If you want to camp on the trail, you’ll need to buy a permit. This is only about $6 AUD, and while there probably won’t be anyone there to check, the money goes to rainforest conservation, so is well spent.
Mount Bartle Frere Hike: GPX Route
Below you’ll find the track that I took to the summit. Throughout the hike, you’ll find markings every kilometer, usually found on rocks. There are also coloured ribbons along the trail to help you not get lost.
If you stay on the main Mount Bartle Frere track, then you’ll be taking the same route that I have. If you have a GPS fitness watch like a Garmin, or you want to follow the route with an app, you can download the GPX file below. Note that the exact elevation data won’t be 100% accurate. It seems that my Garmin’s altimeter was about 50M off at the summit.
GPX File: Download
My Strava: Visit
You can also download the official QLD Parks Mount Bartle Frere map here.
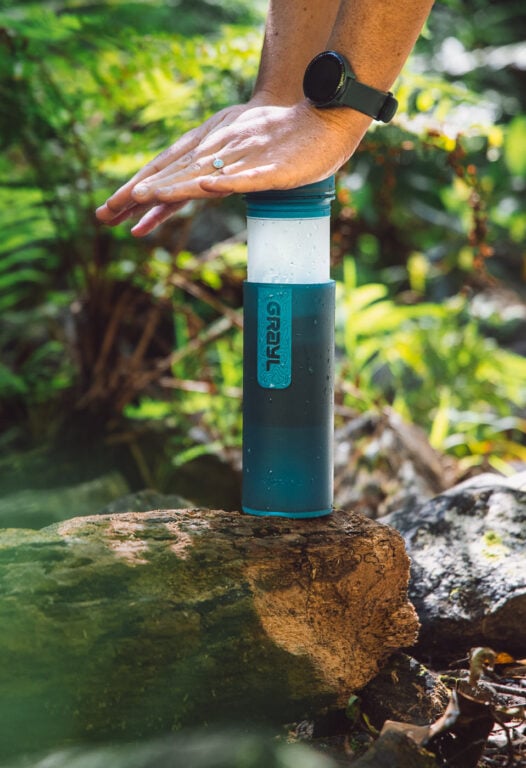
#1 Water Bottle Filter
Enter the Grayl GeoPress Water Filter & Purifier Bottle! I take this bottle on every hike and use it as my go-to source for filtering water all over the world. I’ve even used it to drink tap water in India!
// Compare how the GeoPress stacks up against the best water bottle filters on the market.
Best Time to Hike Mount Bartle Frere
The best time to climb Mount Bartle Frere is in the dry season, from March to September. This season offers cooler weather, less rain, and much better hiking conditions overall.
It is possible to climb Mount Bartle Frere in the tropical wet summer season, however, it can get very wet and slippery. The leeches are also known to be pretty treacherous during this season.
Weather and Climate
Mount Bartle Frere is part of the bigger Bellenden Ker Range, which also has a peak with the same name. These mountains seem to have their own climates and generate their own cloud and rain patterns.
The foothills of the mountain are generally pretty warm and humid, consisting mostly of tropical rainforest. Once you begin your ascent, you’ll notice that the weather cools and shifts to cloud forest climates.
Due to the unique weather and climate of Mount Bartle Frere, the summit and surrounding ranges are typically 10 degrees cooler than the coast. This means that if you’re looking to camp, then it can get pretty cold at night, even in Summer.

Josephine Falls Carpark to Big Rock Camp
The first two kilometers are very easy. You’ll enjoy a gentle warm-up stroll through incredible tropical rainforest, typical of the Cairns coast and especially Wooronooran National Park.
After approximately 3 kilometers, you’ll make the first river crossings, one directly after the other. In the dry season, this was calm and easy to cross. However, I can imagine it could flow pretty hard in the wet season.
Shortly after, you’ll reach Big Rock Camp, where there is a small space for a tent. To the left will be the path to Broken Nose Lookout, however, you’ll need to follow the trail to the right which leads to the Mount Bartle Frere summit.

Related: Kahlpahlim Rock Hike
Begin the Ascent to Mount Bartle Frere
Almost immediately after diverting from the Broken Nose Lookout trail, you’ll notice the incline begin. There are short segments of intermittent, vertical root climbing and gradual climbs.
Kilometer 4 and 5 are the toughest by far. This section is very steep and continuous at a constant incline. You’ll have some vertical sections where you can climb the thick roots straight up the mountain. Don’t worry, it’s not technical, just a little hard on the legs.


Breaking Out of the Rainforest
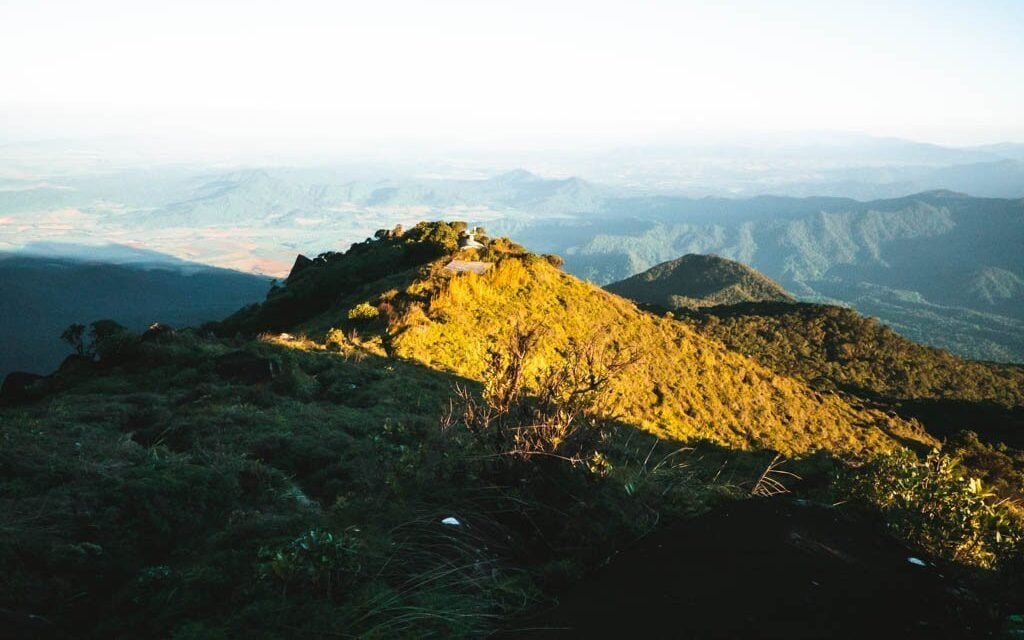
At approximately 6KM, you’ll begin to notice the terrain changing to large boulders, some of which you’ll need to climb over. Soon after this, you’ll break out of the thick rainforest and be rewarded with your first views.
Follow the signs on the rocks as you scramble up the boulders in the clearing.
Shortly after, and just before the 7KM mark, you’ll notice the emergency hut and evacuation helicopter pad known as the Eastern Summit Camp.
Congratulations, the worst of the hike is behind you.


RELATED: Devils Thumb Hike – (Manjal Jimalji)
Mt Bartle Frere Eastern Summit Camp: Where to Camp
The emergency hut can be a useful spot to get out of the elements and change your clothes. A little further up the trail past the helicopter pad and through the short shrubs is a small clearing large enough for a two-man tent.
From the Eastern Summit Camp, it’s only another 45 minutes or so to reach the summit. Now is a good time to assess how much daylight remains, and whether or not to summit in the morning.
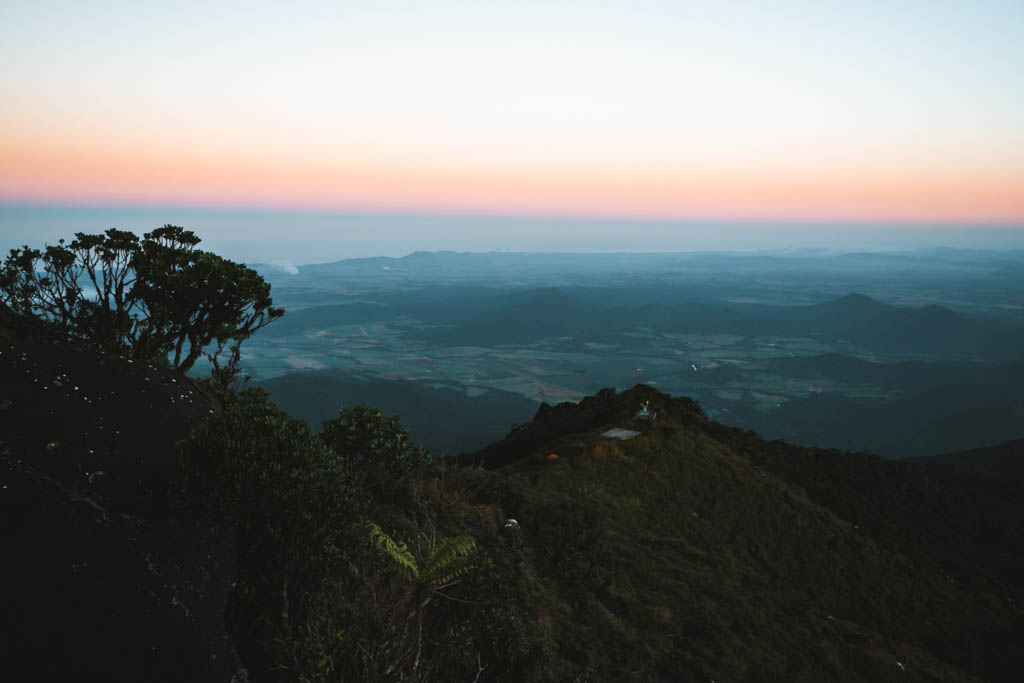
Keep in mind, if you have enough daylight and you have clear weather, then I’d recommend shooting for the Mount Bartle Frere summit. Clouds often linger in the morning making the boulder scramble ahead slippery. You’ll also have better sunrise views from the camp spot than at the summit.
This is the best spot to camp, with incredible views right out of your tent door at the Coral Coast below.


RELATED POST: Cairns Hikes: 36 Best Hikes in Cairns, Tropical North Queensland
Approaching the Summit
Just further up is a false peak. The next section is mostly boulder scrambling, which is easier due to the bolted rails. However, this can be very slippery and difficult in the wet season.
After clearing the false summit, there is a short section of flat terrain covered in thin bushes. In my opinion, this section has the best 360-degree views you’ll get on the Mount Bartle Frere hike.
After this, you’ll once again be drawn into the rainforest, taking the winding trail and a final steep climb to the summit


Mount Bartle Frere Summit Views
The Mount Bartle Frere summit is fairly anti-climatic, especially considering the steep effort. It’s not much more than a small clearing shrouded in taller trees and a sign.
You won’t have any views at the very top, however, there is a boulder to your left as you approach which you can stand on and get excellent views of the Tablelands.

Sunrise on Top of Queensland’s Tallest Peak
Considering spending the night below the peak of Queensland’s tallest mountain? Hopefully, these sunrise photos inspire you to take a little longer.


The Descent
If you have someone to pick you up, and you want to through-hike. Then it’s possible to continue down the Western Ridge. However, if you decide to descend on the same side, then you’ll just need to follow the same trail that you came in on.
The descent is much easier, however, might get a little hard on your knees. It took us roughly 4 hours to reach Josephine Falls carpark from the Eastern Summit Camp.
Josephine Falls
What better way to celebrate the summit than a swim in a tropical rainforest waterfall? Josephine Falls is only a short 700-meter dash from the carpark and is definitely worth the visit.

READ THE FULL BLOG POST: Josephine Falls – Wooronooran National Park, Cairns
MY CAMERA AND PHOTOGRAPHY EQUIPMENT
- Mirrorless Camera: Canon R5
- Drone: DJI Mavic Pro 2
- 360 Action Camera: Insta360 One X2
- Landscape Lens: Canon RF 15-35mm f/2.8L
- All-Round Lens: Canon RF 24-105mm f/4L
- Telephoto Lens: Canon RF 100-500mm f/f/4.5-7.1 L
- Long Action Pole: Insta360 Invisible Pole (BulletTime)
- Landscape Lens Filter: Hoya Circular Polarizer
- Camera Backpack: F-Stop Tilopa
- Favorite Photography Accessory: Peak Design Capture Clip
For a list of all my recommended photography gear (including what I use and why) check out my guide to camera gear for travel.
If you’d like to use any of the photographs on this website, please visit my licensing page to find out how. I also sell professional fine-art prints, visit my Print Store or contact me directly for customs prints of any images on We Seek Travel.
More Things to do Near Cairns
