
Avalanche Peak New Zealand is a steep but rewarding day hike to an alpine peak overlooking the incredible Arthur’s Pass and surrounding mountains. A complete hiking guide to tackling the Arthur’s Peak route independently.
By far my favourite hike around Arthur’s Pass was the Avalanche Peak route. The great thing about this hike is that it can be completed in a loop, which means you’ll get great views of the entire surrounding area.
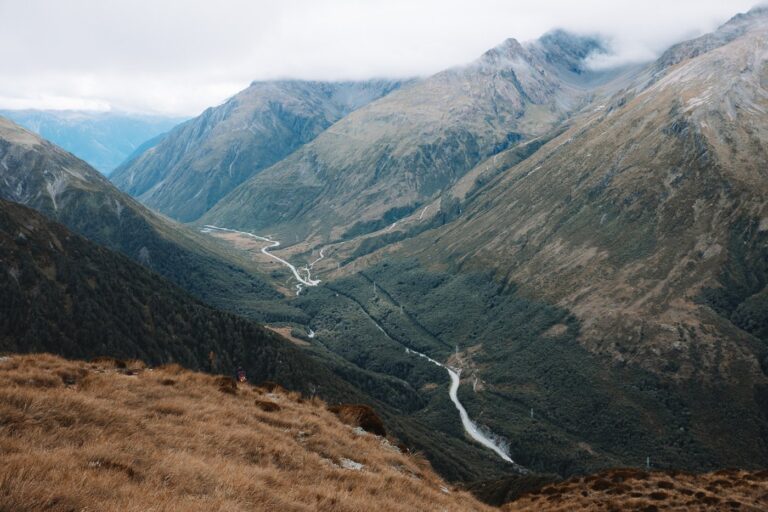
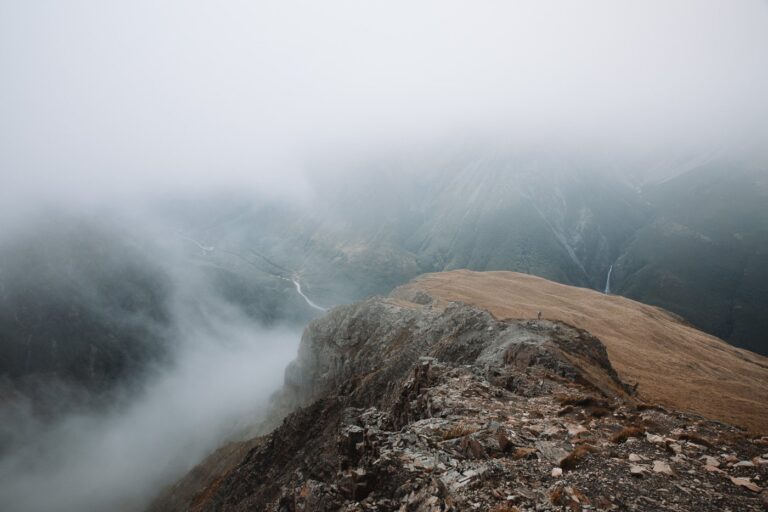
I hit the Avalanche Peak trail upon first arriving at Arthur’s Pass. It was a great way to get views over the area and I even got to see Devil’s Punchbowl waterfall from the adjacent mountain range. Unfortunately, I didn’t get to witness the grandiose views promised from this 1833-metre peak since there was lots of stubborn low-cloud cover that day.
Where is the Avalanche Peak Track?
There are two tracks that join up to the Avalanche Peak summit. Both start on the SH73 near Arthur's Pass Village. There is an option to hike both as a loop, or ascend and come back down on the same track.
I'd recommend starting with the Avalanche Peak Track and descending on Scotts Route. You'll find the trailhead signpost just opposite the road from the new visitor center (before Glasgow Creek). I've pinned the location on the map below.
- TRAILHEAD GPS LOCATION: 42°56'27.9"S 171°33'42.5"E

Related: 6 Epic Things to Do in the Catlins
Avalanche Peak Car Park Location
There's a free parking place just opposite the DOC Visitor Center. We left our car here for most of the day while we explored all the things to do in Arthur's Pass on foot.

Tip: How to Get Around in New Zealand
Rent a car! New Zealand is very safe for motorists & driving is the best way to explore the country.
Make sure to book in advance using a comparison site like DiscoverCars to get the best deals. Or, if you want a camper, my favourite in NZ is Spaceships.
Hiking to Avalanche Peak in New Zealand
- Hike Length/Duration: 9.2 km, 4-6 hours return loop
- Elevation: 1110 m gain, 1833 m AMSL at the peak
- Difficulty: Moderate (steep) in summer, difficult in winter
The Avalanche Peak hike is one of the most challenging, yet rewarding hikes available near Arthur's Pass Village. It's also the only mountain summit in the area with a marked route to the peak.
Sadly, Avalanche Peak New Zealand is renowned for being a dangerous track. In fact, several people have lost their lives making their way up to the Avalanche Peak summit. Remember to always be prepared, monitor weather conditions and speak to the staff at the visitor center to get up-to-date route information and to register intent.
Avalanche warning. The DOC recommends that you have avalanche experience and equipment before undertaking this hike during the avalanche season. Remember to consult the DOC before departing.


Best Travel Insurance for New Zealand Adventures
Safeguard yourself from unforeseen travel mishaps like accidents, cancellations, delays, and loss of your personal items. SafetyWing offers peace of mind travel insurance for adventures in New Zealand at super affordable rates.
Avalanche Peak Hiking Loop GPX File
Here is the GPX route showing the track and path that I took, recorded using my GPS watch. You can download the file by clicking on the link below. Remember that these routes can change, especially in avalanche season. Don't rely on this GPX map as your primary source of navigation.
GPX File: Download
My Strava: Visit
Related: CASTLE HILL NEAR ARTHURS PASS
Avalanche Peak Track and Route
For the purpose of this blog post, I'll outline the route I took; ascend on the Avalanche Peak Track and descend on Scotts Track. Following the tree markers, the track quickly darts into the treeline and almost immediately begins climbing steeply. You'll get a good understanding of what to expect on this hike within the first 5-10 minutes.
Although it's steep, the treeline section isn't technically difficult. There are a few sections where we were able to briefly break out and get great views over the Arthur's Pass Village.

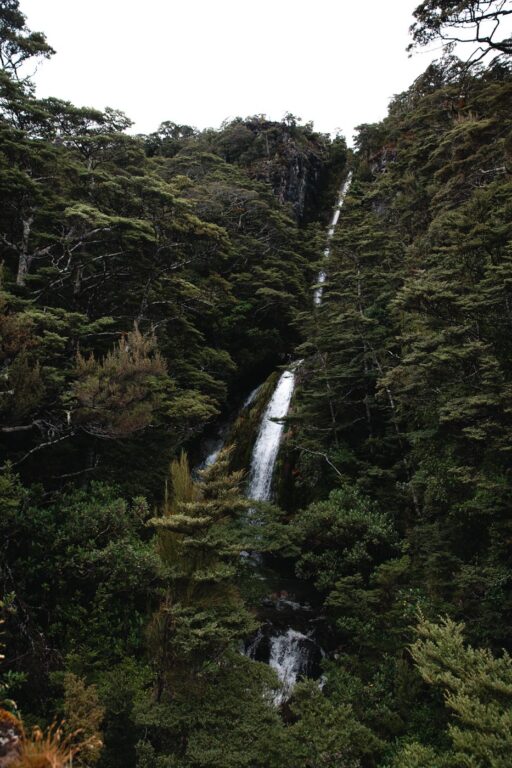
Waterfall on the Trail
After a few minutes of climbing, you'll pass the Avalanche Creek Waterfall. You can get some great shots of it from the trail.

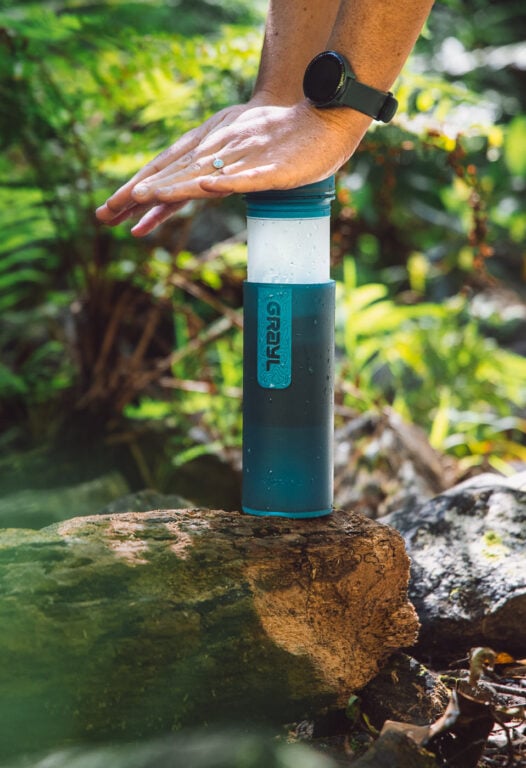
#1 Water Bottle Filter
Enter the Grayl GeoPress Water Filter & Purifier Bottle! I take this bottle on every hike and use it as my go-to source for filtering water all over the world. I've even used it to drink tap water in India!
// Compare how the GeoPress stacks up against the best water bottle filters on the market.
Breaking Through the Treeline
After approximately 1-1.5 hours of hiking, you will finally break out from the tree line and into an exposed alpine area. This is officially the end of the Avalanche Peak Track and the start of the Avalanche Peak Route.
The difference is that a route is just a marked "route" that shows the best way to the peak, while a track is a well-marked and maintained "path" that you can stick to.
This means that this section is much more difficult and requires a bit of focus to make sure you stay in the right direction. The DOC advises that if visibility or conditions are poor, then it's best to turn around at the treeline as this alpine section is exposed and can get dangerous quickly.


Route to the Avalanche Peak Summit
I was hiking here in early Autumn, so the snow hadn't set in yet and the visibility was fair. We followed the yellow pole markers all the way up for another 1 hour until we reached a rocky outcrop. From here, there is a clear route to the summit that leads left.
At this section, you'll see yellow and orange pole markers merging. Remember that the yellow markers indicate Arthur's Peak Route, while the orange markers are for Scott's route.

Loop Return to Arthur's Pass
After taking in the views (of the fog in my case), we began the descent back to Arthurs Pass Village. Following the same route back to the marker merging point, we began the descent, this time following the orange markers for Scotts Route.
The views on the descent were much more impressive for us, with uninterrupted landscapes across the nearby mountains and Devil's Punchbowl Waterfall across the valley.
We spent much longer on the descent as we took photos and watched the Kea birds as they flew overhead.


Descending Scotts Track
After descending Scotts Route, there's a clear, almost door-like entry back into the tree line. This is the start of Scotts Track, which descends back down to State Highway 73, just a few hundred metres further up from where we began the Avalanche Peak track.
From here, you'll also get a great view of Devils Punchbowl Waterfall across the valley.

Where to Stay in Arthur's Pass
- Motel: Arthur's Pass Alpine Motel
One of the best-reviewed and bang-for-buck motels in the area is the famous Alpine Motel. These rooms offer kitchen facilities and great views of the valley and surrounding mountains. It's a great place to sit and relax after ticking off all of the epic things to do in Arthur's Pass! - Hostel: Arthur’s Pass YHA - The YHA at Arthur’s Pass is the only youth hostel or backpacker place in the area. If you’re looking to get out of the car and spend a night indoors, then this is a great bet on a budget.
- Entire Apartment: The Nook - While I didn't stay here, if you're in a larger group or if you'd prefer an entire apartment, then you can't go wrong with The Nook. This place offers a private bathroom, bedroom, living room, and mountain views.

More Photos from Avalanche Peak New Zealand
I strongly believe that if you're always waiting for the "perfect conditions", then you'll inevitably miss out on opportunity altogether. An example of this is that if I had decided to postpone the Avalanche Peak hike due to the heavy fog, then I probably would have missed out on the hike altogether!
Sometimes you just have to get out there. Maybe 3 times out of 10 the conditions might not be ideal, but if you're waiting for the goldilocks hiking conditions then there's a big chance that you might miss out on the other 7 bangers!
Regardless, here are some more photos from my not-so-ideal hiking conditions on Avalanche Peak New Zealand. If you use this guide and snap some better shots than me, make sure to let me know, I'd love to share them.


More Things to do Near Arthur's Pass
I hope you found this guide to hiking Avalanche Peak New Zealand in Arthur's Pass! If you have any questions or any up-to-date track information, please let other trampers know by leaving a comment below.
For now, why not check out some other hikes and travel guides from Arthur's Pass from the list below. Into hiking? Don't miss 31 Best Hikes in South Island New Zealand.
Enjoy!