

Congratulations, you’ve found the most complete and honest guide on how to start a travel blog in 2023. Learn from my mistakes and fast-track your way to becoming a successful travel blogger with these 7 easy steps.
After graduating with a business degree and working in an office for a grand total of 10 months, I knew quickly that a regular 9-5 lifestyle wasn’t for me.
Since then, I’ve been traveling for the past five years living as a digital nomad and travel blogging has been my passion and primary income for the past four years. I started off with no experience with blogging and I’ve learned everything I know from free resources just like this one.
To help other aspiring digital nomads and travelers do the same, I’ve compiled this guide explaining the entire process of how to start a travel blog in just 7 steps.
- Why Would You Want to Start a Travel Blog?
- Do Travel Bloggers Make Money?
- How To Start a Travel Blog – A Step By Step Guide
- Blogging Toolkit: 5 Things You’ll Need to Start a Travel Blog
- 1. Pick a Travel Blog Name & Register It On All Social Media Platforms
- 2. Purchase a Domain Name For Your New Travel Blog
- 3. Set Up Your Hosting
- 4. Install a WordPress Theme and Plugins
- 5. Start Writing Blog Posts
- 6. Publish Your First Blog Post & Start Sharing
- 7. How to Optimize Your Blog For Search Engines (Google)
- Monetizing Your Blog – How to Make Money From a Travel Blog

Disclaimer: this guide will also go more in-depth than others you'll find online because I want to help you get things right from day one. Starting a travel blog in 2023 is different than it was just three years ago. To be successful, you'll want the latest tools and best practices.
Why Would You Want to Start a Travel Blog?
Before we get started, it's important to evaluate whether or not travel blogging is for you. If you asked most people why they'd want to start a travel blog, 9 times out of 10, you'll get a response back that they want to travel full-time while making money.
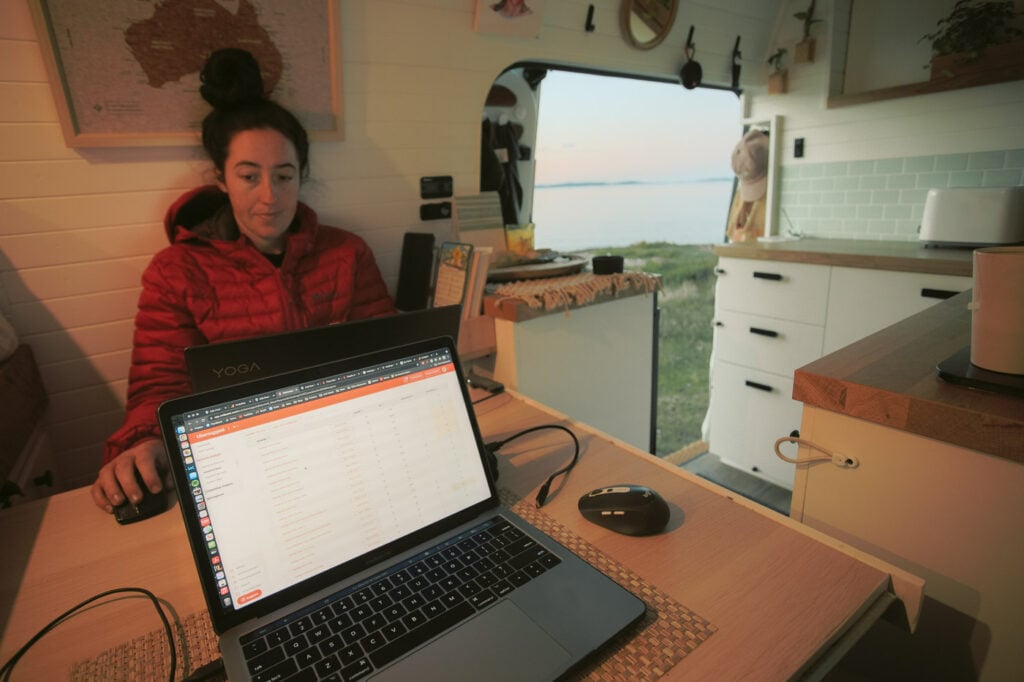
It's the ideal lifestyle for so many. While setting up a travel blog is quite easy, building a sustainable travel blogging lifestyle takes a lot of work. In fact, there are loads of other ways to make money on the road. My partner Haylea and I traveled full-time for two years making money off our laptop by working remote jobs before I even hit publish on We Seek Travel.
I guess what I'm trying to say is that if earning money while traveling is the only goal and you don't really have a passion for creating or writing, then you have a high chance of failing.
That's because doing this right takes a lot of time, energy, and passion for little to no initial reward.

Do Travel Bloggers Make Money?
That's the first thing people usually ask me. Do you make money by writing travel blogs?
The short answer is yes, the long answer is that it takes a lot of time and work to start seeing your first dollar come through.
Blogging in general is a way to build yourself a passive income. This means you will put in the work today for free in order to earn money in the future. The great part about this is that you can go off-grid for a month if you like and still earn money through the work you have put in a year or even a decade before.
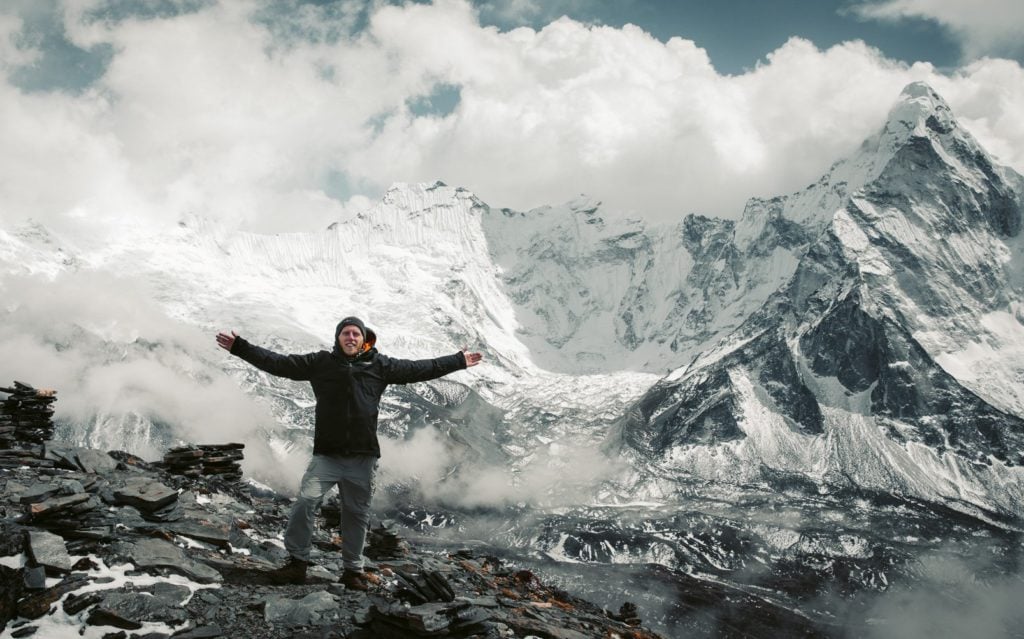
For example, I spent three weeks without touching my laptop while on the Three Passes Trek in the Himalayas and earned a living wage at the same time. The tough part about this is that you might spend hundreds of hours and not see a single dollar for months (or years) down the track.
Recent statistics show that 81% of all blogs created never earned their first $100. Furthermore, only 5% of all bloggers earn a full-time salary from blogging. These statistics account for all blogs. Travel blogs are among the most saturated on the internet. And, therefore standing out in the crowd is even more difficult.
But, that's not to say it's impossible.

I'm among several travel bloggers who make a six-figure, passive wage from doing what I love, and running this blog is now my full-time job. I think it's safe to say this was one of the best decisions I've ever made.
However, to get to this stage I dedicated several hundred hours of blog post writing, blog theme customizing, page speed optimizing, and social sharing– all before I saw my first passive dollar roll in.
I did this because I was passionate about what I was creating and, if I could be paid for it, that would be a bonus, not a priority.
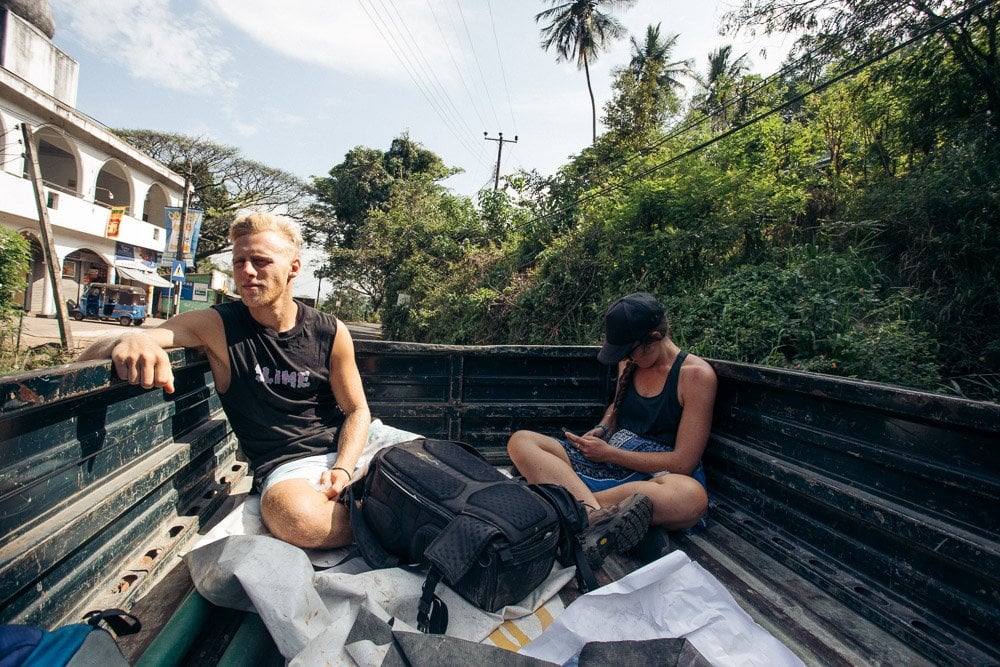
Actually, I was out there traveling and taking photos years before I even considered starting a travel blog. Here's a shot of Haylea and me hitchhiking in Sri Lanka. Even though we don't live off $35 USD per day anymore, we still mostly stick to raw, shoestring travel as a preference.
I know it's a cliche. But, the universe rewards passion and dedication. If you believe in something and you are prepared to put in the hard work, you will be rewarded. If you're interested to learn how to make money from travel blogging, I've included a detailed section on this below.


Tip: Top-Earning Affiliate Networks For Travel Bloggers
Affiliate marketing is one of the best ways to make money from travel blogging. Here are my top-earning partners (you'll want to bookmark them).
- SafetyWing - affordable insurance for nomads
- ShareASale - tonnes of great affiliate programs in one place
- TravelPayouts - earn on referrals from programs like Booking.com, GetYourGuide, and RentalCars in one place
More info below...
How To Start a Travel Blog - A Step By Step Guide
Congratulations, you've gotten through that intense disclaimer. If you're still determined to start a travel blog, then that's absolutely awesome. Let's get it.
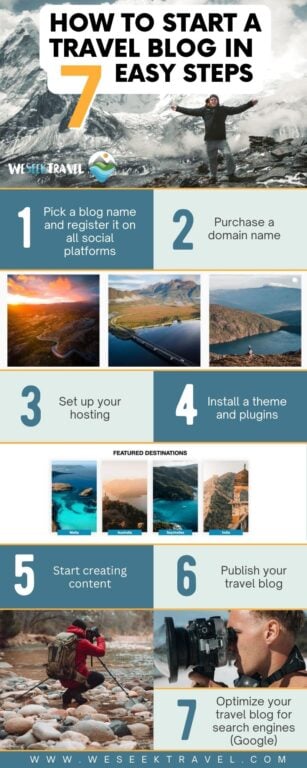
Below is a quick summary of the simple steps required to kick-start your travel blog.
- Pick a blog name and register it on all social platforms
- Purchase a domain name
- Set up your hosting
- Install a theme and plugins
- Start creating content
- Publish your travel blog
- Optimize your travel blog for search engines (Google)
I'll go into detail about the best way to do this below. First, here's step 1.


Blogging Toolkit: 5 Things You'll Need to Start a Travel Blog
This is a very in-depth guide with a lot of recommended resources. If you want to make money from your travel blog, here's what you need.

1. Pick a Travel Blog Name & Register It On All Social Media Platforms
As you might guess, picking a travel blog name is the first step in starting a travel blog. This can be a bit difficult and once you've picked one, you're stuck with it.
However, the name of your travel blog isn't really that important. For example, you don't need to have "travel" in your name but you can if you wish. Choose something that you want to represent your brand and that you feel represents your readers' interests.
A general rule of thumb is to pick something recognizable, simple, and relevant. Pick something that means something to you. Of course, you'll need to check if the name isn't taken.
So, the first step is to...
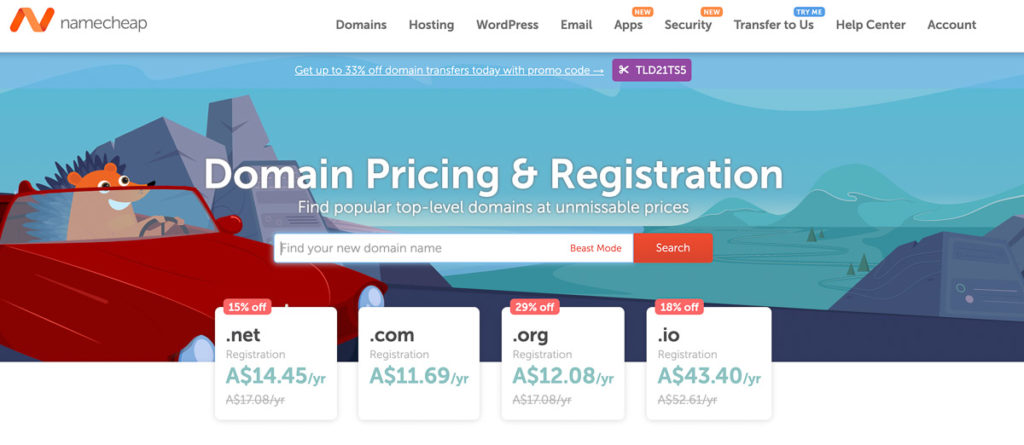
Check if the domain name is available and also if it's available on all social platforms. The domain registrar you choose doesn't really matter, that's why I use NameCheap for this blog and others as they offer the cheapest website domains.
Once you've got it, go ahead and register your social media accounts on the major platforms including:
- Youtube
If you think social media will be a big part of your marketing strategy, I'd go ahead and register it on absolutely everything– it doesn't take much time and you'll be glad you did.
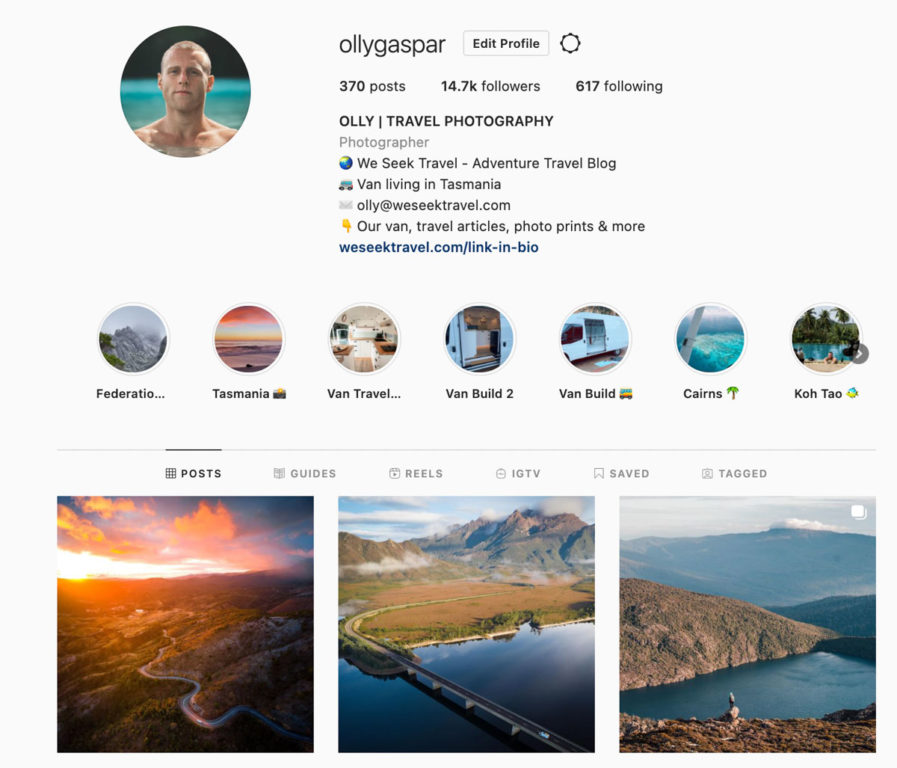

I like to promote my photography on Instagram but don't really enjoy marketing my personality, which is kind of essential if you want to be successful on these platforms. Luckily for me, platforms like Instagram and Tik Tok don't really drive that much traffic to your travel blog, since they are designed to keep users engaged with their apps.
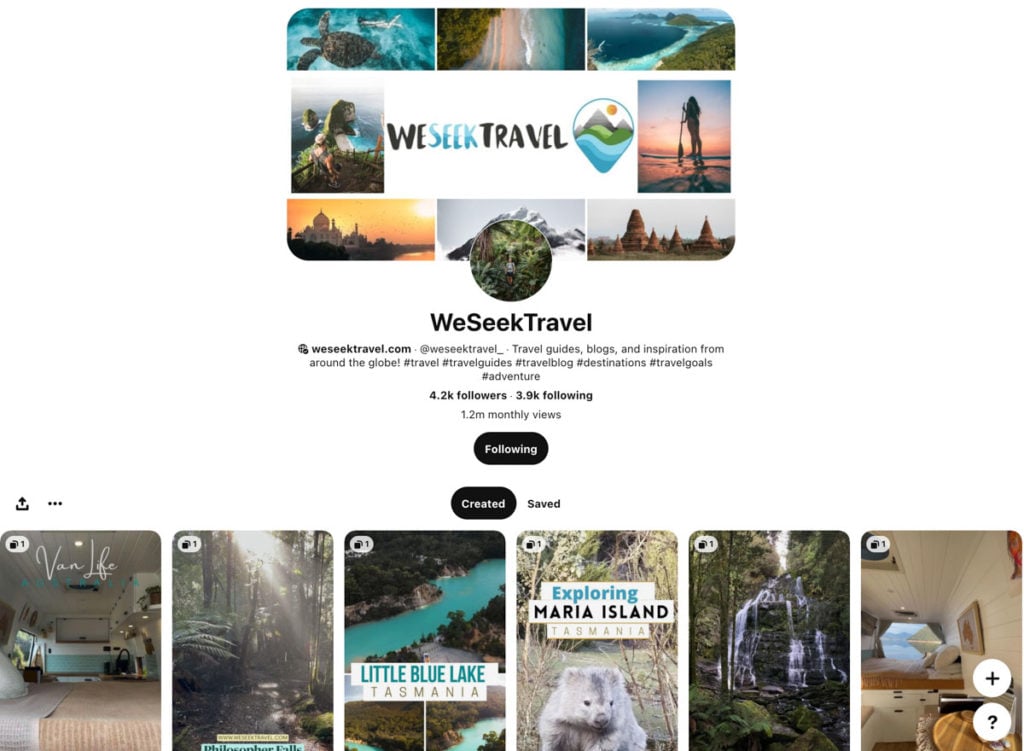
In fact, you might be surprised to find out that Pinterest is generally the most effective social platform for bloggers. The second is Facebook. Remember, travel bloggers don't have to be social media influencers.

Defining Your Blog's Audience (Target Audience)
Defining your target audience is a very important thing in the blogging space. I know that a lot of bloggers don't like to refer to this as choosing a "niche" because they're afraid of making their readers feel like a customer.
But, the fact is if you are starting a travel blog, you are offering a product to an already saturated market, whether you like it or not. If you really want to do this as a lifestyle, it's best to get clued into strategizing early, and that means thinking like a business– even if you don't like to think of your blog as one yet.

So, how do I define my travel blog audience?
What you're looking for is a way that makes your content stand out from the crowd. Generic audiences are incredibly competitive so it's best to focus on what you are good at and more importantly, what you enjoy writing about.
Get out your pen and paper, and write down the answers to these questions.
- What kind of content do I enjoy writing about?
- What makes my style of content different?
- Is there an audience that is interested in this content?
- What can my content offer my readers?
- Are there already other travel bloggers offering the same thing? - Okay, then can I do it better?
This process should be one of the first steps in your own list of how to start a travel blog. In fact, start thinking about it before you choose your name.
The answers to these questions will form the basis of your humble travel blog beginnings.
Remember, don't try to find readers for your content, write for your readers. You can do this by writing about things that you know you'd want to read yourself.

2. Purchase a Domain Name For Your New Travel Blog
Alright, you've decided on the direction for your blog, you've narrowed down a name for it, and you've registered all of your social accounts. Let's actually start creating your new travel blog! The first step is registering your domain name.
A domain name is your URL in your browser. For example www.weseektravel.com.
You have to pay for this, but it's really cheap, usually about $7-$15 per year. I recommend using NameCheap because they usually have the cheapest rates and everything is really beginner-friendly.
I actually started off with Bluehost because they offered a free domain name. But, I ended up migrating my domain name to NameCheap in the second year because the rates were just way cheaper for the same service.
This will be a reoccurring theme in this guide to how to start a travel blog– learn from my mistakes.
Anyways, go ahead and sign up on NameCheap, pay the fee, and, congratulations, you've got your travel blog domain name!

About The Fabled "Self-Hosted WordPress Blog"
This is the part of this guide where I tell you that what you want to do is create a WordPress.org blog. There are dozens of other alternatives like Squarespace, Wix, and other branded site builders.
However, a self-hosted WordPress blog is the holy grail of blogging and is actually cheaper as well. There's a reason why 40% of the internet is built on this platform.
The beginner steps I'm outlining here are a good order to follow to get your new travel blog started right, so more on this below.


3. Set Up Your Hosting
The next step in this travel blog beginner guide is to set up your hosting.
Don't worry it's not as complicated or scary as it sounds. Think of building a travel blog like building a house.
The first step is to get an empty block of land with an address. Well, you've already got that now, it's your domain name.
Next, you're going to have to build your structural foundations. This is your hosting (also referred to as your server).
Types of Web Hosting For Travel Bloggers
Hosting providers run servers, where all of your data is stored and delivered to the internet, accessible via your specific domain name (address).
The thing is, all hosting servers aren't built equally. Since the success of a travel blog relies heavily on receiving organic traffic from search engines like Google, you'll want your server as fast as possible. That's because Google is trying to build a faster internet, and will therefore recommend websites that are faster thanks to its Core Web Vitals updates.
In short, fast blogs show up more on google than slower ones. You also want a reliable server with high up-time (99%+), so your blog is always available to readers.
So, start off right. Save yourself time and money by choosing wisely. There are four types of web hosting, which I'll cover in more detail below.
2023 Update: The quick answer is that I use BigScoots managed WordPress hosting because they handle all the technical aspects for me. I recently changed over from Cloudways since their support was not as strong when you need it. If you're serious about starting a killer blog in 2023, this is the hosting you want and isn't too expensive.
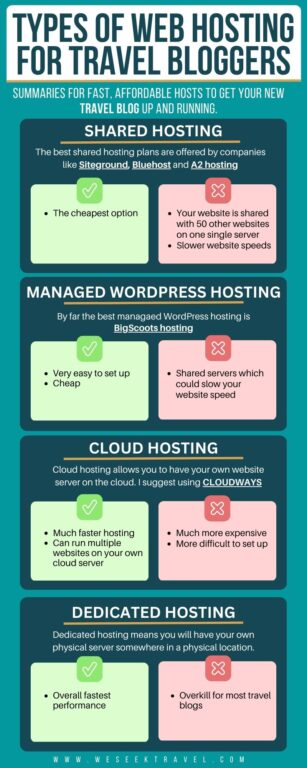

Below is a good summary for fast, affordable hosts to get your new travel blog on its feet quicker.
1. Shared Hosting
Shared hosting is the best for small travel blogs and websites with low traffic.
Pros: The cheapest option is usually $2.50 - $15 per month.
Cons: Your website is shared with up to 50 other websites on a single server, which means your website will be slower and also impacted by spikes in traffic on other websites that live on the same server as yours.
The best shared hosting plans are offered by companies like Siteground, Bluehost and A2 hosting.
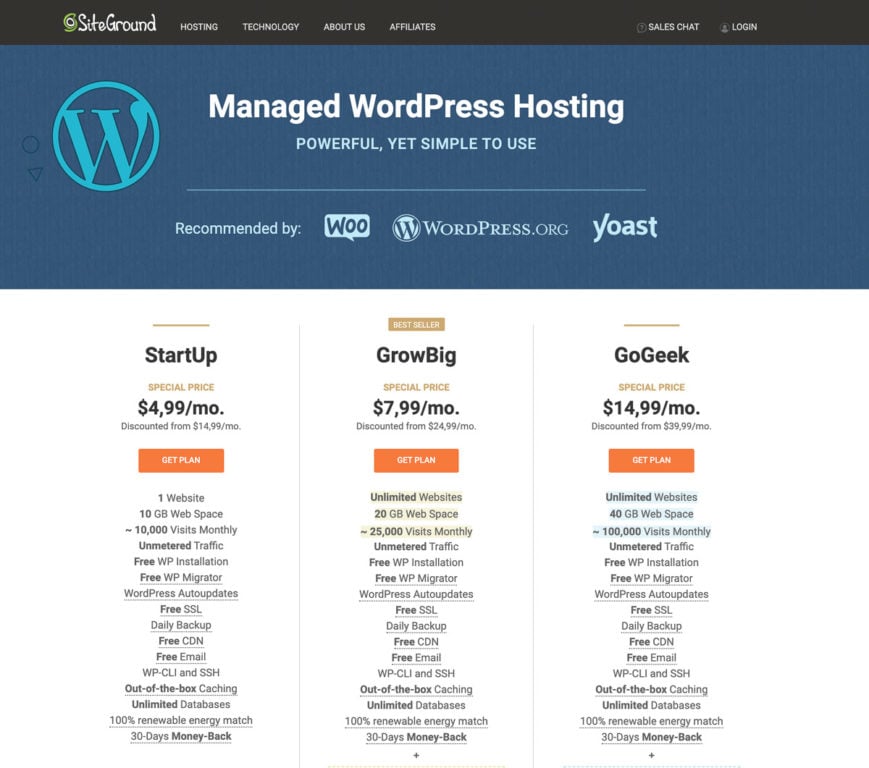
2. Managed WordPress Hosting - the best option for new bloggers
WordPress hosting is a hosting service that specializes in WordPress blogs. Their system is set up to cater to WordPress websites and all of the technical aspects of installing and managing your WordPress installation are done by the hosting provider.
Pros: easiest to set up, costs only $5 - $40 per month.
Cons: Most of them are on "shared servers" meaning big spikes in traffic from other sites will impact the performance of your site as well.
I used Siteground managed WordPress hosting when I started out. However, since then I've swapped to BigScoots hosting, which is by far the best WordPress hosting you can find these days.
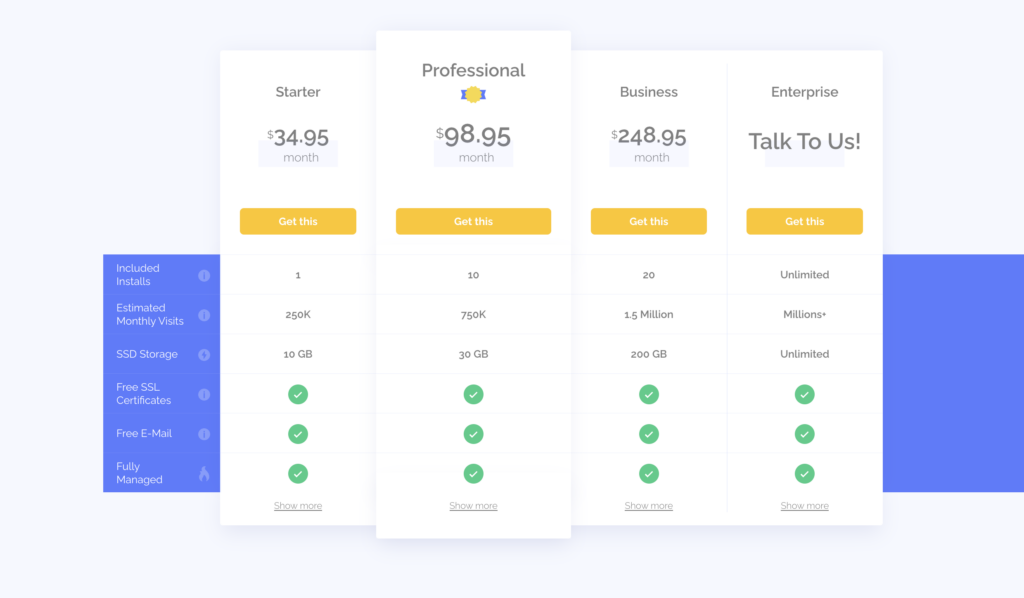
3. Cloud Hosting
Cloud hosting allows you to have your own website server on the cloud.
Pros: This is much faster than shared hosting and you won't need to worry about having other websites slowing down your performance. Also easy to scale as your new travel blog grows and typically allows you to run multiple websites on your own cloud server.
Cons: pricier, ranging from $10-$1000 per month. Also, is more difficult to set up, and requires some server management knowledge.
If you're starting a travel blog and you're willing to learn a little bit of the basics when it comes to servers, a good option is managed WordPress cloud hosting by Cloudways.
4. Dedicated Hosting
Dedicated hosting means you will have your own physical server somewhere in a physical location.
Pros: This offers the best performance and control.
Cons: Pricey, usually $100+ per month and overkill for most travel blogs.
If you're starting a new travel blog, you won't need dedicated hosting. Look at managed WordPress hosting or cloud hosting instead.

Choosing Web Hosting For Your New Travel Blog
If you're just starting out as a travel blogger, I recommend either shared managed WordPress hosting with Siteground for $4.99 a month. Or, if you're serious about your travel blogging journey, then the BigScoots Real Managed Hosting plan is a bit pricier but hands-down a better experience.
Tip: You can always start off on a cheap hosting plan and update to a more rigid one later down the track once you begin generating traffic. Most hosting providers will transfer your site for free.
A great tip is to choose a server location (during the signup process) that is close to where you think the majority of your readers will be located.
For example, if you are going to publish a lot of travel content about South East Asia, choose a server location in Singapore. If you're going to blog about travel in the USA, choose a server in Ohio. This makes loading time for your readers much faster by reducing latency.
Both of my recommended providers are quite easy to set up. Simply follow the steps and if you run into any trouble, hit up their support. There are also many instructional videos for beginners to help install and optimize WordPress (find the posts from your host) so the process is quite straightforward.

Link Your Domain Name To Your New Hosting
Alright, now we're really getting the ball rolling on starting this new travel blog. You've got yourself an address (domain name) and your structural foundations (hosting)– let's bring them together!
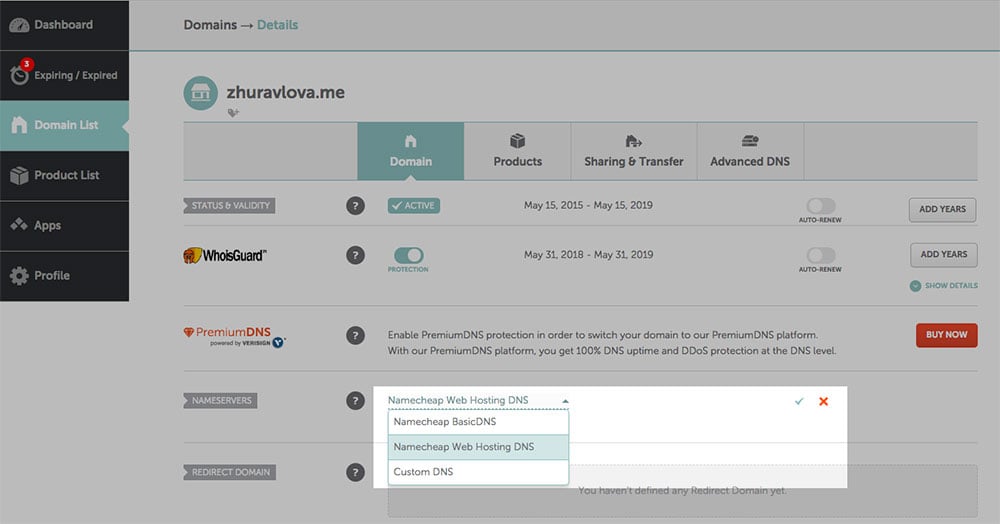
What you want to do is go to NameCheap (or your domain registrar if you chose another one) and go to DNS settings. This is found in your Account Dashboard area under your Domain List tab on the left. Click "manage" on your domain name.
Scroll down to "NameServers" and select Namecheap Basic DNS. Now, your hosting plan will have provided you with the nameservers to use here. Otherwise, you'll find it in your dashboard section when you log into your hosting plan.
Enter the nameservers provided by your hosting plan and click save. Basically, this has told everyone visiting "yourtravelblog.com" to load the data on your web hosting server. This process can take a few hours to complete, so just be patient.

Don't Forget to Enable Your SSL Certificate (If Necessary)
What you will also want to do is install a free SSL certificate for your domain name. Right now, look up on your browser next to the URL on this page. See that little lock symbol? That means that this website is secure and authorized with an SSL certificate (this means the website has "https://" in front of the URL, instead of "http://").
But, don't worry too much about what this means if this is getting a bit technical for you, just make sure you install one. These days, most Managed WordPress hosting services will do this automatically.
If you choose BigScoots, they'll do this for you. Other shared plans or Cloud servers, you'll need to google their guides on how to install your certificate.


4. Install a WordPress Theme and Plugins
We're now halfway through this guide on how to start a travel blog and you've already got your blog live on the internet.
Go check it out, if you've done it right, check by typing in your domain name in your browser. Your new travel blog should pop up as a generic WordPress website, ready for you to customize and start publishing content on.

Tip: Picking a Premium Theme (Personalized Blog Layout)
The next step is choosing a theme. Think of this as the facade of your house. This will dictate how your blog looks and feels.
When I started my travel blog I made the mistake of just choosing a cheap theme that I thought looked great.
Unfortunately, I had to change my entire website layout after I'd already published 300 articles because my theme wasn't being updated and was getting slower and slower.
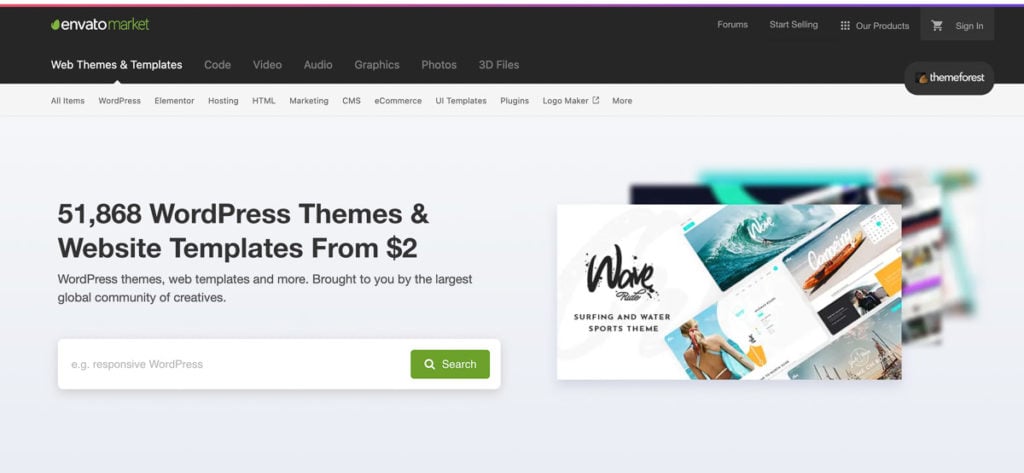
Want a unique theme? I'd recommend checking themes on Envato Market (also called ThemeForest) and choosing one that has lots of great reviews, prioritizes load speed, and is frequently updated.

Recommended WordPress Themes for Travel Blogging
If you're serious about travel blogging, I typically don't recommend a free theme. Trust me on this, it's a much better idea to buy a quality premium theme and don't look back. You often only have to pay once and then get access to updates forever.
High-quality premium WordPress themes usually cost between $40 to $250 for a once-off-payment.
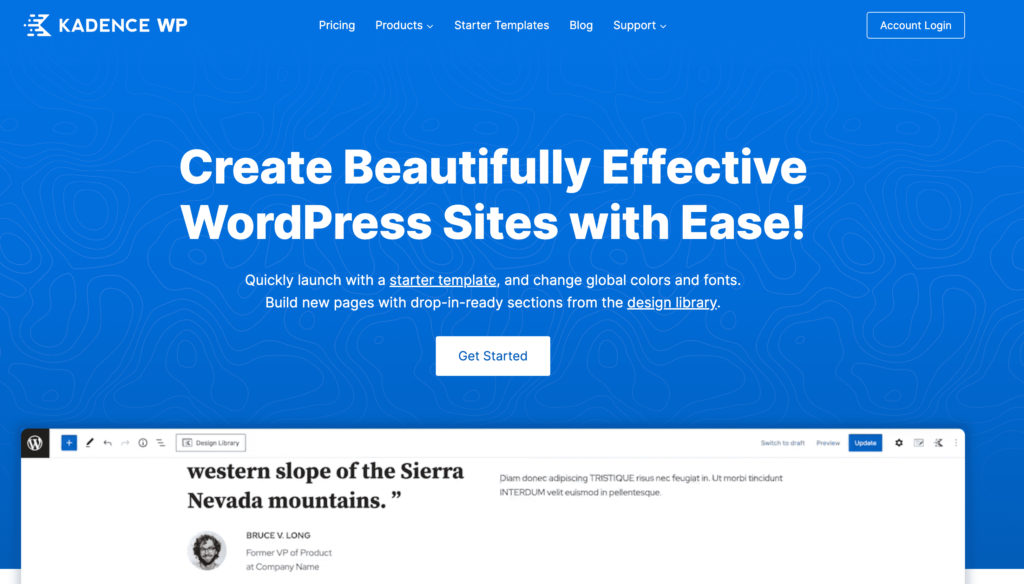
If you really want to keep costs down, then the only free theme that I'd recommend anybody to use is Kadence. While I don't use this, I have used it on other sites and it is possible to get fast and responsive layouts if you stick to the very basic blocks.
Otherwise, the fastest and best paid WordPress themes for blogs are:
- GeneratePress
- Kadence - with Kadence blocks plugin (use Gutenberg, not Elementor)
- Trellis (best for Mediavine publishers) - this is what I use now, although I paid a developer to customize it and make it 100% unique (not necessary when starting)

Again, in the modern world of blogging, you want your website to be as fast as possible. This helps you show up on google and offers a better experience for your readers.
A good quality theme will be really lightweight and will offer customization options to make your travel blog unique. My strategy is to avoid picking a theme with all the bells and whistles and instead keep things as simple as possible to focus on my content.
Did you know that 40% of mobile users abandon a website if it takes longer than 3 seconds to load?
Installing Your New Theme
When you purchase a theme, you'll get a download link with a .zip folder. Every good theme will have a detailed guide on how to install it but generally, it's quite easy.
Here's how you do it.
Log into your WordPress dashboard, which is usually found under "yourtravelblog.com/wp-admin/". Here is where you manage your WordPress blog, write blog posts, install plugins and do everything you need to do that impacts the front-end side of your site (what visitors see).
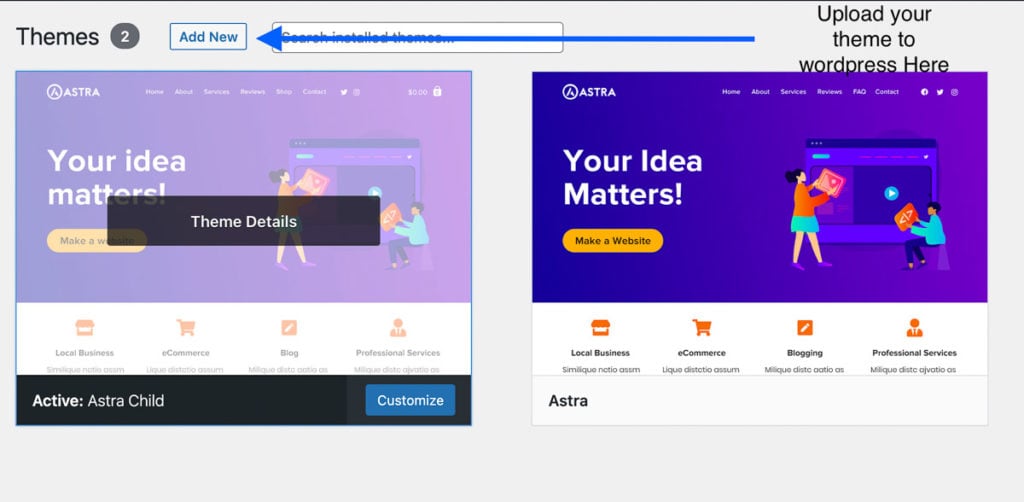
On the left panel, go to Appearance > Themes.
Once here, click Add New and upload the .zip file that came with your theme purchase.
All good themes will also come with a child theme. Basically, this allows you to make custom changes to your layout that aren't affected by theme updates.
After you upload your theme, upload the child.zip folder as well, then activate your child theme.

Now, Customize Your Theme
Next, it's a good idea to install a Starter Template for your theme.
All themes are highly customizable but it's difficult to start customizing without any inspiration. A Starter Template has pre-populated content, sample articles, and pages that are already tweaked for the theme you have purchased.
Installing these will depend on which theme you choose, but every good theme will have a detailed walkthrough on how to activate a starter template.
Once you've chosen a layout you like, let's start customizing your new travel blog!
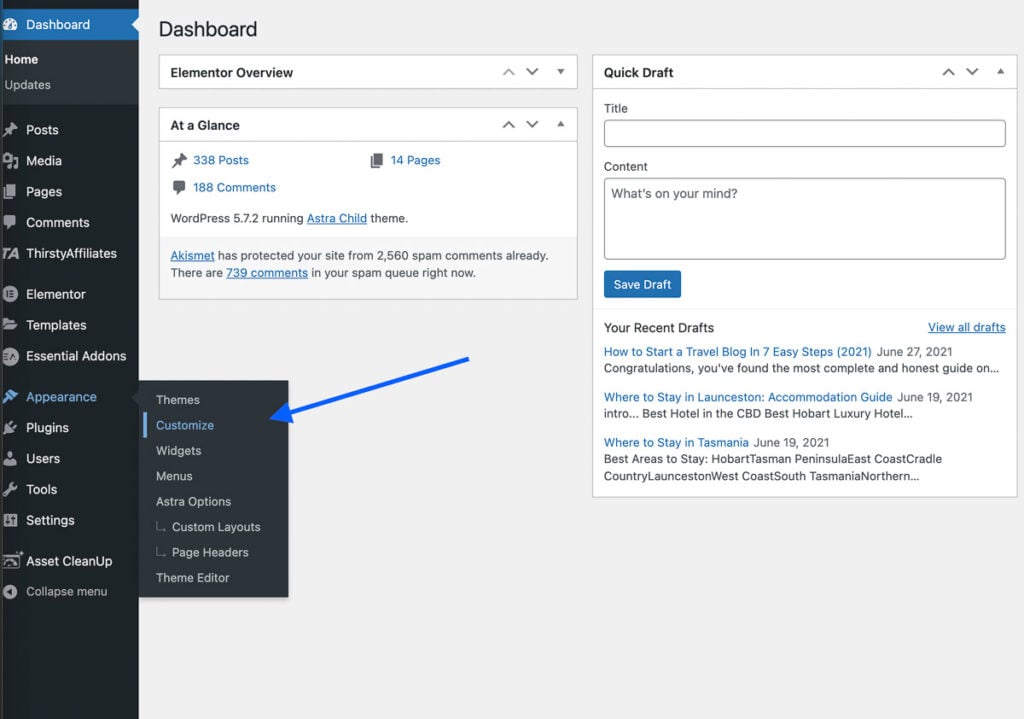
Again, on your WordPress Dashboard (available at yoursite.com/wp-admin/), go to Appearance > Customize.
Start going through the options and make some site-wide changes like colors, fonts, image sizes, etc.

A general rule of thumb is to go easy on the customization and keep things simple. Here are some tips to make your travel blog as fast and user-friendly as possible:
- Choose your brand colors and stick with them throughout your website. Choose high-contrast colors, for example, black or dark-grey text on a white background. This makes it easier to read and won't give you problems with Google later down the track.
- Choose two font types only, one for your body and one for your text. Every single font on your website has to be loaded manually every time someone visits your website, increasing page load time. Choose fonts that are large and easy to read. Alternatively, skip custom fonts altogether to make things even faster by using "inherit", which loads the default font on the user's device.
- Prioritize mobile-view. All quality WordPress themes are "responsive". This means that all the content you create will automatically be shown and scaled to the device the reader is using (i.e mobile, desktop, or tablet). However, when you're customizing your travel blog layout, try to prioritize mobile view, since around 75% of visitors will be using a phone.
Do this by clicking the little mobile icon on the bottom of the Customize screen. Try to make changes that look good on mobile and also work well on the desktop and tablet views.
Install WordPress Plugins
When you're happy with your layout, the next step in starting a travel blog is installing plugins. You can do this
These are simple little apps that install on your WordPress site. They can help you accomplish anything from preventing spam comments, optimizing your site speed, or adding useful features like relevant posts or customized content in your blog posts.
However, before you start installing everything, be warned.
A general rule of thumb when it comes to plugins is to keep it simple. Yes, it's a reoccurring theme in this beginner travel blog guide but trust me, I've learned from my mistakes. The more plugins you install, the more problems you're likely to encounter with conflicts and slowing down your website. Only install what you think is necessary.
Not sure what you need? Here are some necessary plugins that I believe every travel blog should install when starting out.
- Yoast SEO - helps you create content that will rank on Google
- A caching/optimization plugin - this makes your website faster. The best is WPRocket but if you pick BigScoots hosting, they offer their own premium plugin.
- Image optimization plugin - compresses your images to make websites faster. I don't use this as I only upload already optimized photos using custom settings in Adobe Lightroom to save server space. But, it'll be useful for those who don't know what they're doing. A good one is ShortPixel.
Tip: avoid using "Page Builders" like Elementor. WordPress has its own native page builder named Gutenberg, which is much faster and more reliable. If you see a theme that requires a custom page builder, avoid it.


That's it. That's all you'll really need to start an awesome travel blog. All of these plugins are free besides WPRocket, but you can use free caching alternatives like W3 Total Cache or the free caching plugin that comes with your host if they offer it.
Once you get the ball rolling and start requiring premium features, you can upgrade the plugins you love. But, when you first start off travel blogging, the free plugins will suffice.
5. Start Writing Blog Posts
See, starting a travel blog is easy! This is most of the technical stuff out of the way.
Okay, this blog post might seem a little more complicated than the other beginner guides out there but I'm leaving nothing out so that you can start a successful blog, not just launch one!
The next step is to start creating awesome content. I bet you've already got some great blog post ideas and stories to tell. Head over to your WordPress dashboard again and on the left side, click Posts, then Add New.
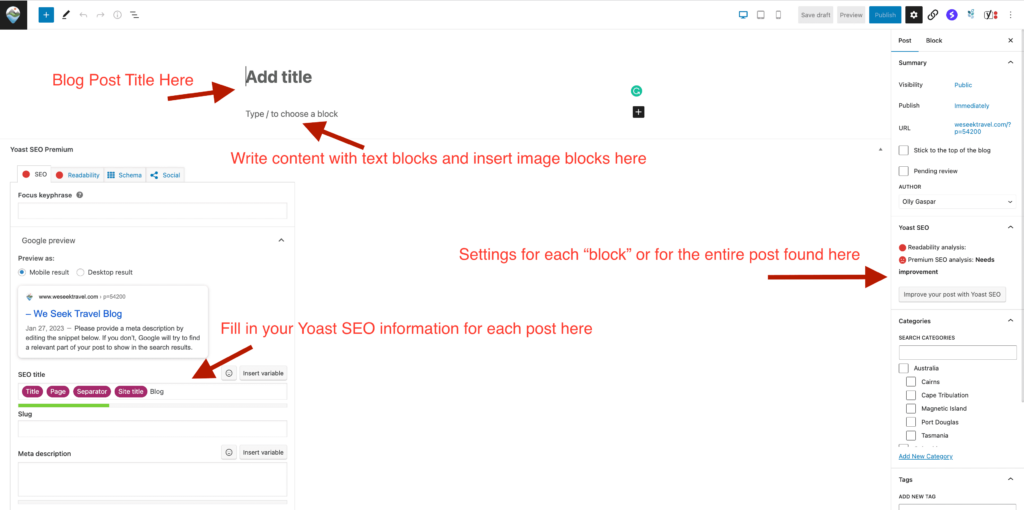

WordPress uses the new Gutenberg block editor by default. This is really easy to use as you can just add headings, images, and text into your post with the click of a button– no coding required!
On the right side of your screen, you'll see the settings tab. Here you can customize each block or change settings for your post. You'll want to add things like a featured image, a category, and tags.
Understanding Categories & Tags
Categories and tags are a WordPress tool that helps viewers navigate to similar content across your website.
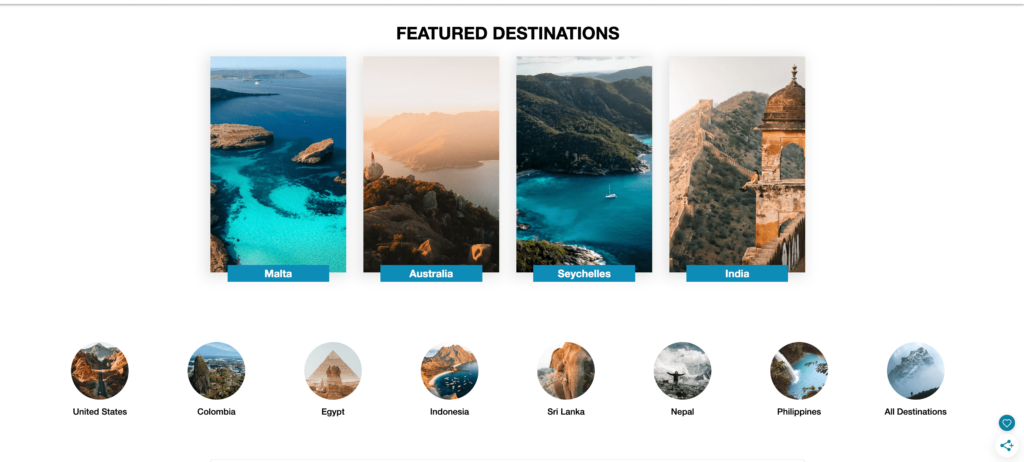
I use a simple category layout on my travel blog with destinations by country. In the tags, I include specifics about the post.
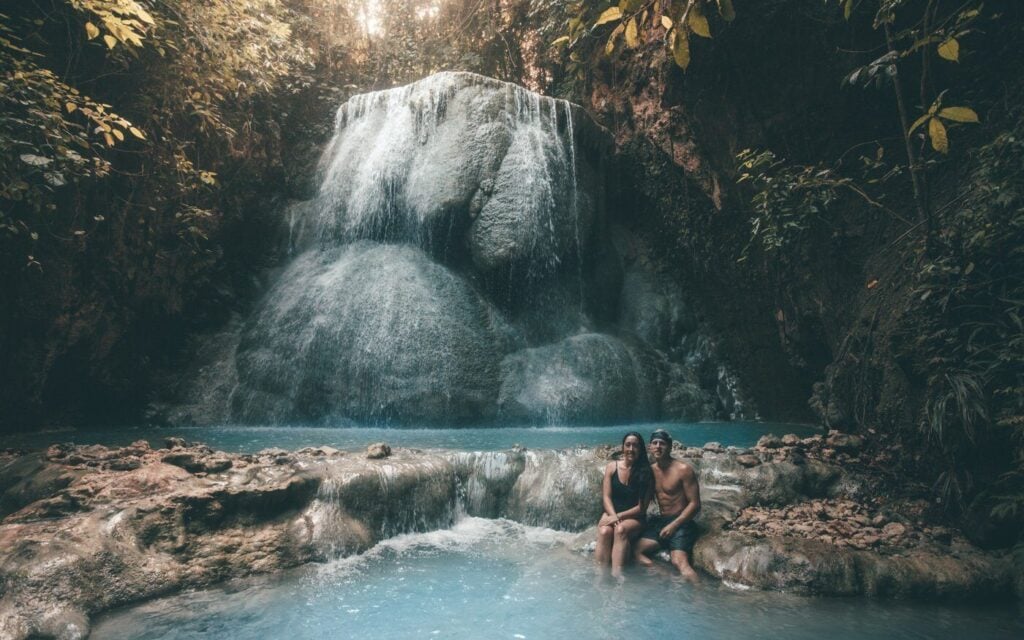
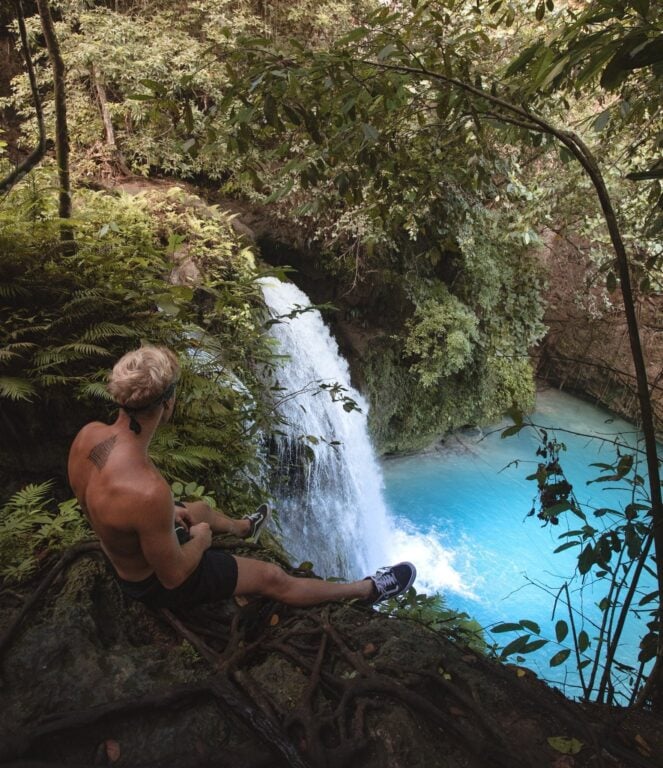
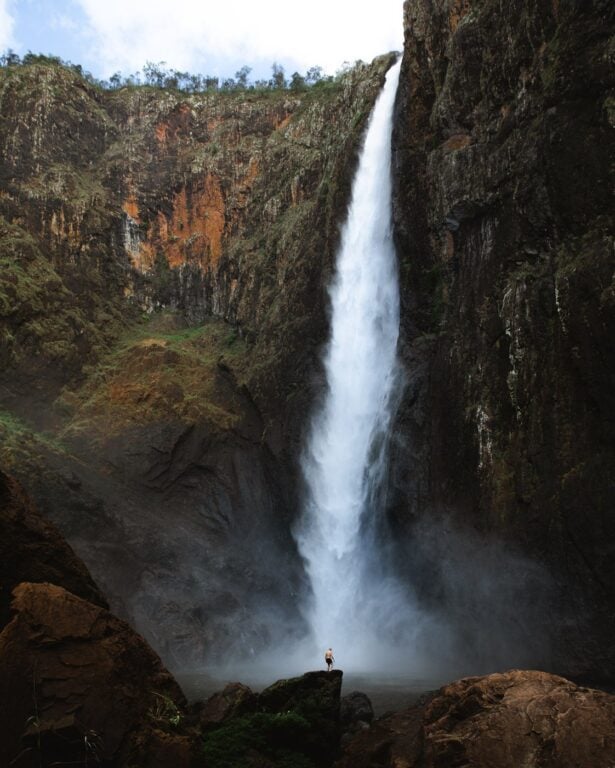
For example, it might be a waterfall hike in Cebu, Philippines. So, I'd use a category of the Philippines. My tags would be broader themes like "waterfalls" and "hiking".
It's totally up to you how you'd like to structure your navigation but try to keep it simple, organized, and relevant to your content. Remember, Gooogle likes structure.
Having a hundred different tags isn't going to help you with SEO. In fact, Google doesn't like "thin content". Try to focus on generating as much content around a topic or destination as possible. However, there's no cheating Google, the only strategy that works is creating content that is a great experience for human readers.

6. Publish Your First Blog Post & Start Sharing
Once you've got a few great posts that you want to get out there, hit publish and start sharing them. Hit up all your social platforms and let everyone know that you've just started a travel blog!
Congratulations, you've done it, you're now a travel blogger.

Tip: Once you get the ball rolling, you can track your success by setting up Google Analytics. This is a way to monitor traffic across your travel blog and specific blog posts. This is a free service that tracks page views across the web, including from social media channels and Google search.
7. How to Optimize Your Blog For Search Engines (Google)
88% of my traffic comes directly from Google for people searching for keywords that I aim to rank for. 5% comes from Pinterest and the rest is direct traffic from people who use my blog as a direct resource.
This is not irregular. In order for people to find your new travel blog, you will need to show up on Google.
In order to do this, you want to optimize your articles for these search engines. This practice is called search engine optimization (SEO). Basically, you target specific phrases or keywords that people will be searching for.
Essential SEO Tools for Travel Bloggers
Learning about SEO takes time. But, there are some very useful tools and resources that you'll want to use to help speed up the process and get you ranking on the first page of Google.
When starting a travel blog, I highly recommend the following:
- Keyword Research Tools: If you're serious about blogging, I highly recommend paying for RankIQ as this includes thousands of hand-picked keywords sorted by rank difficulty and time to the first page. I don't want to say that this is the secret to my success, but it has certainly played a huge role in it. Otherwise, there are some tools that you can use to find keywords yourself
- Ubersuggest - decent and has a free option (limited)
- Keysearch - better option but costs around $13 per month
- SEO Plugin: Yoast SEO - a WordPress plugin that makes sure your articles are optimized for the selected keyword you chose in the keyword research stage.
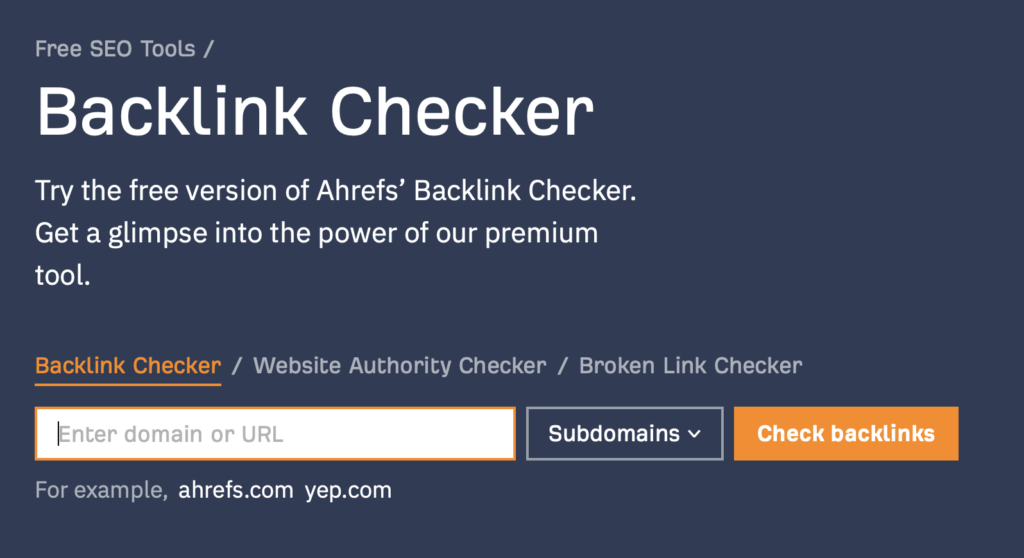
- SEMRush or Ahrefs - premium SEO and keyword research tools that cost a lot more than the others. Very good tools but many will be too complex for beginner bloggers and are very pricey.
So, which tools do I actually need?
If you're serious about starting a successful travel blog, then I recommend:
- RankIQ - $49 per month
- BigScoots Hosting - $34 per month
- Domain Name - $7 per year
- Kadence Theme (free) or Trellis - $149 per year
This will set you up with a professional blogging framework for under $250 in total upfront costs (less than $100 if you choose the Kadence theme, although Trellis is worth it).
Establishing Blog Posting Strategies That Work - A Beginner's Guide to SEO
The easy part is done and now the real work begins. There are many different strategies for becoming successful with blogging.
Here's what you should be doing:
- Choose the right keywords
- Understand search intent
- Content Clustering
- Establishing Authority


1. Choosing the Right Keywords as a beginner Travel Blogger
However, what I see a lot of new travel bloggers do is publish their first posts aiming for really competitive keywords.
For example, you might not want to try to rank for "Things to do in Australia" or "Europe Itinerary" in your first posts. You simply won't show up on the first page.
Instead, you will want to try to rank for smaller keywords first, then try to rank for the big stuff.
Here's why:
- One of the biggest ranking factors is backlinks. The more links you have to your travel blog, the more "authority" you have in google rankings. This takes time and the more content you have that gets seen, the higher the chances are that people are going to link to your posts.
- Content needs to be relevant. It takes time for Google's algorithm to determine what your blog is all about. I try to write as comprehensively as I can about each destination that I visit to provide my readers with the most comprehensive guides, and to show Google that I know a lot about these destinations.
This is why I recommend so many new bloggers to use RankIQ. They offer hand-picked travel keywords for destinations all over the world, which takes the guesswork out of what you should be writing about.


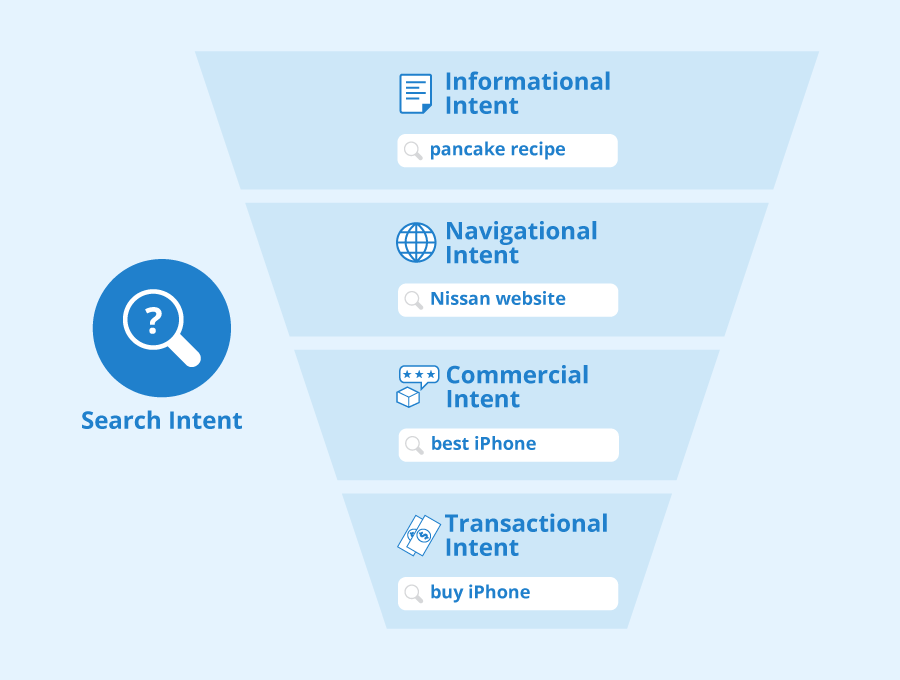
2. Understand Search Intent
At the end of the day, Google exists PRIMARILY to recommend the best pieces of information that satisfy the query typed into its search bar– this is called Search Intent. The company spends millions, if not billions of dollars developing the best algorithms to sort and rank the 50 billion websites that exist on Google to suit every single search phrase.
Understanding this means understanding your job as a travel blogger. Think, what does a HUMAN want when searching these "keywords"? This should be your foundation for SEO and is the first step you consider when planning your blog post outlines.

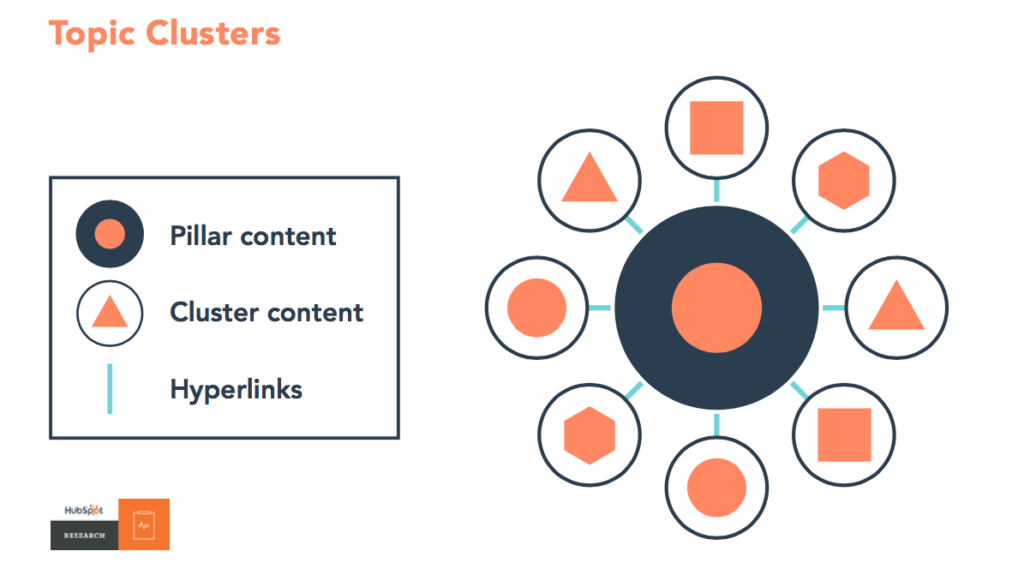
3. Content Clustering
My strategy has always been to consider content as king.
The way I see it, the more valuable content I can create, the more visitors I'll get.
I publish a lot of "smaller" and more specific blog posts and guides about certain destinations or activities. Then, I create large cornerstone posts that summarize all of my smaller posts and link them all together.
For example, I've published 36 separate blog posts on some of my favorite hikes in Cairns, Australia. Then, I wrote a mega-post of all the best hikes in Cairns, linking to every single individual post, and every smaller post links back to the cornerstone post. This is now a huge cluster of information related to hiking in Cairns– google loves it.
Effectively, I write many articles around a specific topic and spread it out as a content web. Then, visitors arrive at my travel blog through many different search terms on Google and Pinterest. There's no additional cost for advertising, and I don't need to spend a lot of time on social media.

4. Establishing Authority
Best of all, Google increasingly sees me as an authority on a certain destination since I've written a lot of great content around it. Naturally, these articles also get links from other bloggers and big websites who notice the detail I put into the articles– and so, the authority grows!
Getting other sites to link to yours grows your Domain Authority, much like the most cited research papers represent the most authoritative information in research journals.
Links will build naturally if you create great content. But a good way to boost your rankings is to share your content as much as possible.
Avoid excessive direct link swapping and paying for backlinks at all costs as Google penalizes this under spam (unnatural link building).

Other Strategies
On the flip side, some travel bloggers don't consider content clusters and choose to write maybe 20-30 great blog posts and then spend the rest of their time marketing them on social media or even using detrimental black hat SEO strategies like manipulative link-building.
I'd prefer the long-term route and the one recommended by Google itself.
However, at the end of the day, it's a good idea to find out what works for you. And, more importantly, do it in a way that you enjoy!


What About Page Speed?
I also touched on this earlier but this is a good one to get right from day one.
I recommend reading a lot of articles about how you can optimize your new travel blog to be as fast as possible so Google prioritizes your posts over old, slow websites.
Kinsta has the most comprehensive guide I've ever found.
A quick and free speed boost you can use after you've got your travel blog started is to use a CDN.
Using a CDN like Cloudflare (free) can dramatically increase your website speed and in my opinion, is essential for a successful travel blog in 2023. Basically, a CDN, or content delivery network, will reduce delays in loading time by reducing the physical distance between your server and your readers.
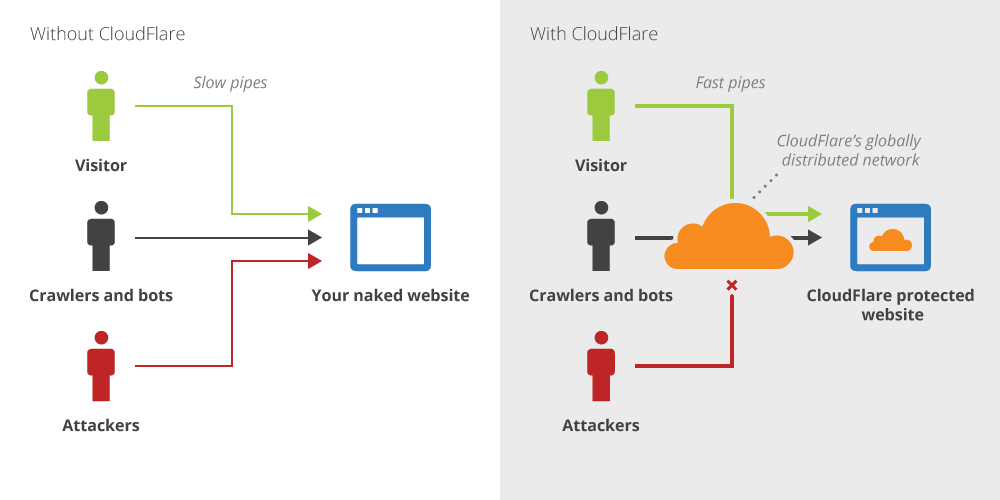

You can set this up in a few clicks when first launching your travel blog, or once it's already live.
It works on top of all of your other optimizations and therefore it is very easy to set up and can be done after you've customized your theme.
Monetizing Your Blog - How to Make Money From a Travel Blog
Remember when I said that you won't start making money straight away?
Well, it's true. In saying that, if you plan to make a living from your blog as I do, there are a few things you can focus on from day one to set you up for monetization.
There are many different ways to make money from travel blogging. The top three are:
- Joining an affiliate program
- Display advertising
- Indirect income
Below I'll go into a bit more detail on each of these so that you can implement these strategies on your own travel blog.
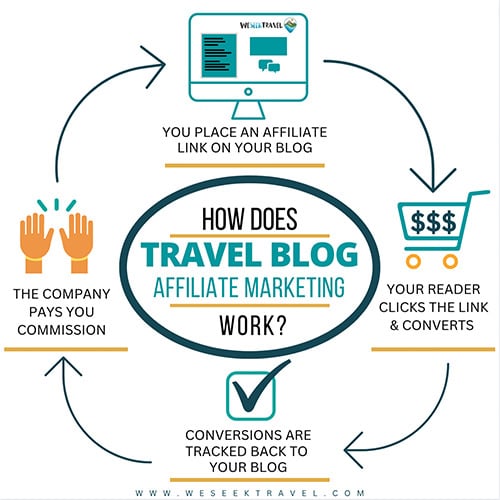
Affiliate Marketing With Travel Blogging - Passive Income
Basically, bloggers can partner with travel companies that they use themselves.
Join up for their affiliate programs and start recommending things like the accommodation you stay in and tours and experiences you go on. If a visitor clicks one of those links and ends up booking or making an order, you'll get a small commission of the sale. It's a win-win because it also doesn't cost anything for the visitor, they pay the same as if they were going to visit the website directly.

It's really easy to set up but you'll want to have some good-quality content before you apply to become a partner.
My most successful affiliate partners are:
- TravelPayouts - a dashboard with programs like Booking.com to GetYourGuide in one place
- SafetyWing - the best-earning travel insurance affiliate
- ShareaSale - tonnes of great travel brands available on one dashboard
Remember, try to be as honest and helpful as possible, recommending only products or services that you use yourself. The currency of blogging is trust.
Display Advertising - Passive Income
It took me roughly two years to start serving ads on my travel blog.
The thing is, nobody likes them.
However, serving ads in my content allows me to make a living and keeps me on the road. With that said, I honestly wouldn't bother serving ads until you have at least 25,000 monthly sessions. That's because you won't have enough traffic to get into a reputable ad management service like Mediavine.
Instead, you'll be stuck with Adsense and some less-than-par alternatives. For me at least, the money you receive from these sources are not worth clogging your website with ads.

Indirect Income From Travel Blogging
Some of the money you can make from a travel blog doesn't actually come directly from your blog. Instead, your blog can be used as advertising for your services.
For example, I have a Media Kit page where companies often reach out to me for photography services or to license content that I've created. This isn't passive income but it's also great to do paid jobs every now and then.
I've also got a Print Store on here where readers purchase fine art prints.
You'll also notice many other bloggers selling online courses and other digital products and using their travel blogs to promote it organically.


Good Luck With Your New Travel Blog!
I really hope that this comprehensive guide on how to start a travel blog has been useful to you. If you decide that this is a lifestyle that you want to pursue, then go chase it with all you have!
If you have any questions that I didn't cover in this guide to starting a travel blog, leave a comment below or reach out to me personally. I'd love to help other people who are wanting to become travel bloggers or content creators!